Has your beloved stuffed animal seen better days? Over time and love, rips, holes, and loose stuffing can appear, leaving your snuggly companion looking worse for wear. Luckily, sewing up a stuffed animal is an easy fix to make them look good as new!
If you need a quick answer on the essential steps for sewing up your stuffed toy: thoroughly clean the stuffed animal, sew up any rips and holes, restuff lightly, and stitch up the opening. Read on below for more details on materials needed and each step of the repair process.
In this comprehensive guide, you’ll learn everything there is to know about sewing up a stuffed animal. We’ll cover the full process from start to finish including:
Materials You’ll Need to Sew Up a Stuffed Animal
A Needle and Matching Thread
The most essential supply for mending a stuffed animal is a sharp, sturdy needle, sized to fit the thickness of the fabric, along with high-quality all-purpose thread to match the color of the toy (polyester thread works best).
You’ll want to use a shorter needle with a sharp point and large eye so it can easily pierce the stuffed animal’s fabric; between 3/4″ to 1 1/2″ is an ideal length. Investing just a couple dollars for quality materials makes an enormous difference in how successful your repair will turn out.
Polyester Fiberfill Stuffing
The insides of most store-bought stuffed animals is a fluffy polyester batting called fiberfill. This special stuffing returns to its original shape after compression, unlike materials like cotton which can become lumpy.
Fiberfill stuffing is very lightweight and affordable – an 8 oz bag priced at $5-10 can re-stuff multiple medium-sized plush toys. If the original stuffing of your toy has become flattened or degraded, use new fiberfill so your mended friend regains its soft, huggable shape.
Fabric Scraps (Optional)
If the rip in your stuffed pal is large, you may need fabric pieces to patch over big holes or rebuild deflated sections. Scraps from an old cotton bed sheet or apparel item work perfectly. Opt for a lightweight, soft fabric in a coordinating color/pattern. You likely only need small irregular squares or rectangles just an inch or two wider than each hole or gap being covered.
As an eco-friendly option, repurpose your own worn out t-shirts or bedding instead of buying new fabric.
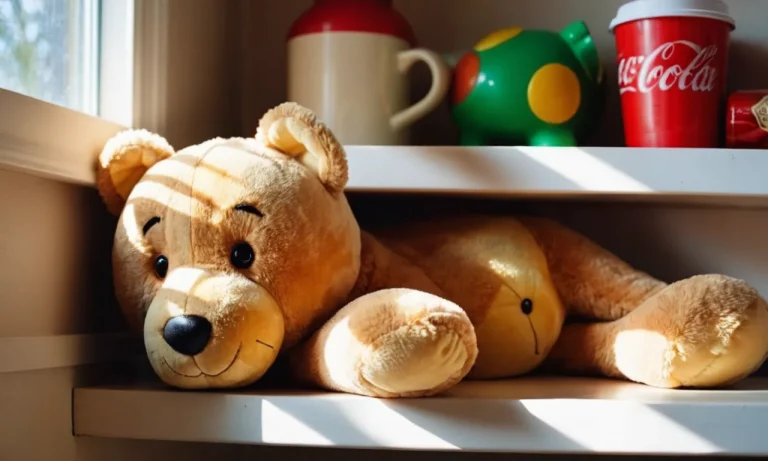
A Stuffed Animal in Need of Repair
Last but not least, you obviously need a beloved plushie that requires some stitching up! Over years of love and play, even the finest quality stuffed pals get abrasions, ripped seams, holes worn through the fabric, and crushed stuffing.
Mended with care, these special toys regain their cuddle factor. Most types of stuffed animals can be hand-sewn as long as the main body structure remains intact – think teddy bears, dogs, cats, elephants or dinosaurs.
Repair difficulty depends somewhat on size; tiny bean bag animals or jumbo 3-4 foot teddies involve some extra effort. But with the right mending supplies, patience, care and affection, nearly any fabric friend can be restored to its original glory.
How to Clean a Stuffed Animal Before Sewing
Surface Clean Gently
Before sewing up any tears or holes in your beloved stuffed friend, it’s important to clean the surface gently first. Use a soft brush or cloth to lightly dust off loose dirt. Spot treat any visible stains by dabbing lightly with a damp cloth and mild detergent.
Be very gentle during this process to avoid damaging the fabric or existing seams.
Hand Wash When Very Dirty
If your stuffed pal is looking dingy or has stubborn dirt and stains, a gentle hand wash may be needed. Fill a sink, basin, or bathtub with lukewarm water and add a small amount of mild laundry detergent (avoid harsh chemicals).
Fully submerge your stuffed animal and let it soak for 5-10 minutes, gently squeezing and swishing the water through the fabric. Drain the dirty water and refill, repeating the soaking and swishing until the water runs clear.
Be sure to thoroughly rinse away all soap then gently press excess water out of the fabric.According to The Spruce Crafts, air drying stuffed animals in sunlight can help sanitize and brighten the fabrics. Just be sure they are 100% dry before attempting repairs to avoid trapping moisture inside.
Sewing Up Holes and Rips in Stuffed Toys
Thread The Needle and Knot End
The first step when mending a beloved stuffed animal is to thread your needle and tie a knot at the end of the thread. This creates a secure starting point so the first stitch doesn’t pull through. Use a needle with an eye big enough for the thread to pass through easily.
Then, make sure to tie a tight double or triple knot so it doesn’t come undone mid-stitch. Having properly threaded needle in hand will make the sewing process smooth sailing.
Whipstitch Edges of Holes/Rips
Once your needle is ready to go, it’s time to whipstitch the hole or rip closed. Whipstitching simply means taking tiny uniform stitches to sew two edges together. Match up the edges as closely as possible before sewing.
Then begin by pushing the needle up from the backside of the fabric and gently pulling the thread all the way through. Next, move the needle over 1/8″ to 1/4″ and push it back down through both layers of fabric again.
Continue this way all the way down the seam, keeping the tension even, until the hole or rip is fully closed up.
Going slowly and carefully here is crucial for getting a seam that holds. Rushed stitches that are too loose or uneven could easily come undone with further use and play. So take your time and remember that perfectly mended stuffed animals are worth the effort!
Go Slowly and Check Alignment
As you make progress closing the hole inch-by-inch, occasionally stop to check that the edges still line up properly. It’s easy for the flexible fabric to shift out of alignment as you go, which can result in uneven seams.
So pause Every few stitches to visually inspect the edges and gently pinch the fabric back into place as needed.
Also, if you’re fixing a rip, ensure any printed graphics on the fabric continue to match up on both sides. Straightening out images or patterns as you sew keeps the look of the toy consistent. Taking it slow and double-checking alignment guarantees your work holds up well once the stuffed animal goes back into a child’s loving arms.
Secure Knot at End
After reaching the end of the hole or rip, finish up by knotting off the thread. This keeps everything securely in place and prevents any chance of stitches unraveling later on. Take care tying the finishing knot—it should be tight and flush with the edge of the seam for both practical and aesthetic purposes.
Additionally, use sharp scissors to trim any excess hanging threads so they don’t get pulled or unraveled when the toy is played with. Finally, give the whole project one last inspection, gently stretching the area to ensure your handiwork stays together.
When all looks good, the beloved stuffed animal is finally ready for another round of love!
How to Restuff a Stuffed Animal and Sew It Closed
Use Small Amounts of Fiberfill
When restuffing a stuffed animal, it’s important not to overstuff it. Instead, use small handfuls of fiberfill stuffing at a time. According to the All People Quilt website, only adding a little bit before sewing allows you to distribute the stuffing and ensure the toy is not over-packed.
Polyester fiberfill stuffing is recommended by most doll makers, like this list from MakeDolly, since it retains the fluffy texture well over time. As you add handfuls of stuffing, use a chopstick or blunt pencil to distribute and fluff it up inside the toy.
That helps fill in gaps and create an even layer of stuffing throughout.
Distribute Evenly Without Overstuffing
It can be tempting to really pack in that fiberfill to make your stuffed friend extra squishy and plump. But overstuffing leads to problems down the road according to craft site Textile Crafts. An overstuffed toy puts strain on the seams which can eventually pop stitches or tear holes.
So resist going overboard!
Check that each section – the head, body, limbs – are moderately filled but still have some squish. Following doll designer By Hand London’s advice, lay your toy flat and ensure the stuffing is spread evenly throughout before sewing closed.
Ladder Stitch Closed
The most secure and invisible way to close your opening is by hand sewing a ladder stitch, according to crafters at My Blueprint. Thread a curved needle and tie a double knot at the end. Then stitch by picking up just a few threads of the edge of the opening on one side, then the other.
Your stitches will look like the rungs of a ladder crossing the gap.
For extra strength, Treasurie recommends doing each section twice. First, do a standard ladder stitch working front to back across the opening. Then stitch again working back to front. The two rows of ladder stitches neatly lock together for very secure closure.
Be sure to snip threads and hide knotted ends inside the stuffed toy when done.
Now your beloved stuffed friend is patched up, fluffed up and ready for more fun and cuddles! 👍 With some fiberfill to plump it up and ladder stitches to close the seam, restuffing and sewing closed toys is an easy fix.
Sew On Replacement Eyes, Noses, or Parts
Over time, your beloved stuffed animal may start to show some wear and tear. Eyes or noses may fall off, seams may split, or stuffing may peek out from small holes. While this can feel devastating, especially if the toy has sentimental value, the good news is that stuffed animals can often be repaired and restored to their original glory!
Assess the Damage
First, thoroughly examine your stuffed friend to identify all problem areas. Check for loose or missing eyes, noses, bows, collars, or other accessories. Inspect the seams and stitching for any splits or gaps where stuffing is escaping.
Make a list of all repairs needed so you can gather the necessary supplies before starting.
Purchase Supplies
For sewing repairs, you’ll need a basic sewing kit with needles, thread, pins, fabric scissors, and seam ripper. Opt for thread that matches the color of your stuffed animal’s fur or fabric as closely as possible.
You may also need to purchase replacement parts like plastic safety eyes, fuzzy noses, or bendable wire for posable limbs depending on what needs fixing.
Carefully Remove Damaged Areas
If you’re replacing a part that’s partially attached like an eye or nose, carefully snip any remaining threads to fully detach it. For split seams or holes, you may need to rip some additional stitching to open the area enough to restuff and resew. Take care not to damage the surrounding fabric.
Any stuffing that has escaped can be picked out through the hole then replaced with new polyfill stuffing.
Pin and Sew New Parts In Place
Once the damaged spot is prepped, pin the new part in place aligned as it should sit on the stuffed animal. For plastic safety eyes, refer to the package for how far apart and deep to embed them. Place a thick needle or awl through the eye setting perforations before sewing to keep them open.
Use tight overcast stitches around the eye edges to secure them.
For noses and other accessories, whip stitch or ladder stitch them into place by sewing around the edges. Take care not to stitch through any internal structures if sewing into an opening. Add a dab of fabric glue inside for extra hold if needed.
Close Any Holes and Voids
For split seams, holes, or damaged areas, pinch the opening closed then sew it shut with a ladder stitch, working around the gap perimeter. Add new stuffing through any remaining unsewn opening to plump up the animal again.
Sprinkle in a little bit at a time, gently poking and spreading it out before adding more to evenly distribute the fibers and avoid lumps or bald spots.
Admire Your Handywork!
Once all new parts are securely attached and any holes are closed up, congratulate yourself on a sewing job well done! Your beloved stuffed friend will look good as new. Going forward, be gentle during playtime and periodic inspections for wear can help catch any minor repairs before they grow into bigger issues.
With some care and a little DIY sewing, your favorite stuffed pal can remain in tip-top shape for years to come!
Caring for Stuffed Animals After Sewing Repairs
Gentle Surface Cleaning
Once you have fixed your favorite stuffed pal with some stitching, you’ll want to make sure it stays clean and lasts for years to come. Use a soft brush or cloth dampened with mild soap and lukewarm water to gently remove any surface dirt.
Make sure not to submerge the stuffed animal in water or get the interior stuffing wet. Consult a professional cleaner if there are tough stains.
Let Air Dry Thoroughly
After surface cleaning, dry your plush friend completely before hugging again – moisture can breed mold! Lay the stuffed animal in a well-ventilated area out of direct sunlight. Use a fan to speed up drying if needed.
Wait at least 24 hours to ensure the interior stuffing is fully dry too. Wet stuffing loses shape and gets lumpy over time.
Handle With Care to Avoid New Holes
Now that you’ve repaired your snuggly companion, you’ll want to prevent future harm. Here are some tips:
- Avoid pulling on loose threads or pieces
- Keep away from pets with sharp teeth or claws
- Store safely on shelves instead of floors where it could get stepped on
- Spot clean gently instead of using harsh scrubbing
Protect those vulnerable seams! Your threadwork is only as durable as the materials around it. With proper care and handling, a well-sewn stuffed critter can bring joy for years. Follow these simple steps and that special friend will be ready for more playtime fun ❤️!
| Cleaning Method | Benefits |
|---|---|
| Gentle brushing | Removes surface dirt without harming fibers |
| Damp cloth | Cleans safely with water and mild soap |
| Airing out 24+ hours | Ensures complete interior drying to prevent mold |
For more tips, see the Stuffed Animal Care Guide. With some common sense care, your furry or plush pals will continue bringing snuggles for years to come 😊👍!
Conclusion
Sewing up a beloved stuffed animal may seem difficult, but as you can see, it’s a very approachable DIY sewing project. By following the steps above and taking your time, you can give your snuggly friend new life!
After a bath and some stitch work, they’ll look as good as they did the day you first fell in love.
Knowing how to do basic stuffed animal surgery allows you to make easy fixes when accidents happen. With a needle, thread, polyfill stuffing, and fabric scraps, you have everything you need. Care for your sewn up stuffed buddies gently so your hard work lasts, and enjoy many more years of cuddles!