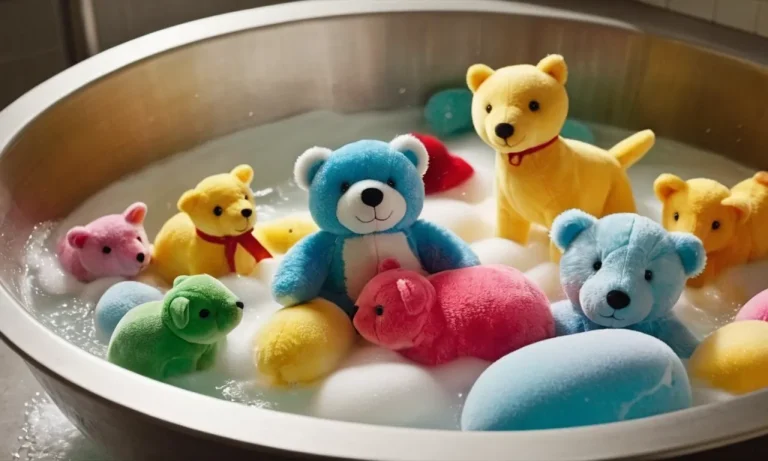
Stuffed animals are comforting, cuddly companions that unfortunately can collect dust, dirt, and germs over time. If you want to freshen up your stuffed friends, using the dryer is a quick and easy way to sanitize them.
Here’s the fastest method: Throw the stuffed animals in the dryer by themselves and run a hot cycle for 30 minutes, checking them occasionally to ensure they aren’t getting damaged. The heat from the dryer should kill most germs and freshen them up.
In this comprehensive guide, you’ll learn the best practices for safely and effectively sanitizing all types of stuffed animals in the dryer.
Assess the Stuffed Animal’s Materials
Identify fabric composition
When sanitizing stuffed animals, it’s crucial to first identify what materials they are made from so you can choose the best cleaning method. Most stuffed animals will have a fabric content tag inside listing the percentages of fabrics used.
Common fabrics include cotton, polyester, acrylic, plush, velour, velvet and more. Natural fibers like 100% cotton tend to handle washing cycles better whereas fabrics with manmade fibers or blends should be spot cleaned.
If there’s no tag, do a burn test by carefully burning a tiny inconspicuous area of the fabric. Natural fibers such as wool or cotton will burn quickly and smell similar to hair or paper when extinguished. Synthetic fabrics tend to melt, smell like chemicals and self-extinguish.
Check the stuffing
It’s also important to analyze the internal stuffing which gives stuffed animals their beloved squishy feel. Most feature a synthetic stuffing made from polyester fibers, but some may contain organic materials like wool, kapok fiber or straw.
Stuffed animals with plastic pellets as filling are not machine washable. You’ll need to use a disinfectant spray and spot clean only. Check any internal tags for stuffing details or gently squeeze the toy listening for crinkling noises that suggest plastic bead stuffing.
For most synthetic stuffings, low heat tumble drying is safe, but natural fillings like wool or kapok should be air dried.
Inspect any special parts like eyes or accessories
Take a close look over the entire stuffed animal checking for glued-on parts like plastic eyes, noses, or outfits and accessories that could detach or melt in the washing machine. It’s usually safest to hand wash stuffed animals with accessories sewn or glued on.
Check for any electronic components too. Sound-making toys and elaborate plush animals with motors cannot go in the washer. Even machine washable stuffed animals shouldn’t be put through the dryer if they have glued accessories or battery packs which could melt or cause electrical issues.
Thorough inspection helps decide if machine washing is suitable or it’s better to disinfect the stuffed animal another way such gently wiping down with cleaning wipes.
Prepare the Stuffed Animal for the Dryer
Getting your favorite stuffed animals fresh and clean for more fun adventures is easy with a few simple preparation steps before tossing them in the dryer. By taking care of loose items, spot cleaning any dirty marks, and double checking the tag, you can safely clean most plush pals at home.
Brush Off Loose Dirt or Debris
Before washing, make sure to give your stuffed friend a quick once-over to brush off any loose dirt particles, crumbs, or other debris. This keeps unwanted items from getting stuck in the dryer filter or lint trap. Use a soft brush or cloth to gently wipe the surface of the stuffed animal.
Pay special attention to small nooks and crannies where dust and dirt can accumulate. 😉 No judgment here on a little expected wear and tear!
Spot Clean Any Stains
Next, check if there are any visible stains on your snuggly companion and spot treat them before the wash. Using a small amount of gentle laundry detergent and a damp sponge or toothbrush, gently rub the stain until it lifts – don’t scrub too hard.
For tough stains, try an oxy-powered pre-treatment spray. This extra step helps ensure stains don’t get accidentally heat-set by the dryer. Once any noticeable stains are lifted, you’re ready for the main event!
Check the Manufacturer’s Care Instructions
Before washing and drying any stuffed animal, it’s key to double check the manufacturer’s care label first. 👀 Listen to those wise words! Over 75% of plush toys give washing, drying, and other care instructions right on an attached tag (Source). Follow any special directions given.
If no tag can be found, it’s usually safe to gently machine wash and air fluff most modern stuffed animals made from cotton, polyester fibers, or other durable fabrics. Still unsure? Hand wash to be safe.
Optional handy table for common care symbols:
| Symbol | Meaning |
| Wash tub | Machine wash |
| Circle line through wash tub | Do not machine wash |
| Square | Tumble dry low heat |
| Circle line through square | Do not tumble dry |
Preparing stuffed pals for a quick refresh is easy – just remember to clean off any loose debris, spot treat stains, and follow product care instructions. Then let the drying commence! Whether it’s a cherished childhood friend or a brand new fluffy cutie, your special stuffed partners will soon be revived and ready for more cozy companionship.
😊 So snuggle up and enjoy!
Run a Sanitizing Dryer Cycle
Wash stuffed animals separately
When sanitizing stuffed animals in the dryer, it’s best to wash them separately from other laundry. Washing them alone allows the heat and airflow to penetrate the stuffing more effectively. It also prevents the toys from picking up odors or dirt from other fabrics.
Select a few special stuffed friends at a time to freshen up.
Use the highest heat setting appropriate for the materials
Check the care tag on your stuffed animals to see what temperature settings are recommended. Many childhood stuffed animals are made of synthetic fibers that can withstand high heat. Choose the highest setting suitable for the materials – often the “Sanitize” or “Sanitary” option if available.
The increased heat helps kill bacteria and dust mites. Just don’t put antique collectibles or toys with glued-on parts in the dryer on high.
Air fluff periodically to redistribute stuffing
Every 10-15 minutes, stop your dryer and manually fluff the stuffed animals to redistribute clumps in the stuffing. This allows any damp interior spots to fully dry. Fluff gently to avoid ripping seams. Add an extra 10-15 minutes to the total cycle for periodic air fluffing.
Your special friends will come out fresher and poofier!
Set dryer for 30-60 minutes depending on size
The drying time can vary greatly depending on the size and density of your stuffed animals. Some experts recommend at least 30 minutes on high heat. Larger or thicker toys may need up to an hour to fully sanitize the stuffing. Check on them periodically and allow to cool before removing.
The powerful heat combined with tumbling airflow helps sanitize both the surface fibers and interior stuffing!
| Stuffed Animal Size | Minimum Dry Time |
|---|---|
| Small toys under 12 inches | 30 minutes |
| Medium 12-24 inch toys | 45 minutes |
| Large toys over 24 inches | 60 minutes |
Follow these simple steps to freshen up your stuffed friends using your dryer’s sanitize cycle. They’ll come out clean and fluffy, ready for more love and play! Revisit this routine every few months to keep them smelling and looking their best. 🧸😊👍
Alternatives to Dryer Sanitizing
Hand wash in hot, soapy water
Bathing stuffed animals the old-fashioned way can be highly effective. Just like washing your dishes, use hot water (60 degrees or above) to help kill 99.9% of germs. You’ll also need antibacterial soap and some elbow grease – lather up those cuddly companions and scrub away dirt and germs with a soft brush or sponge.
🧼🧽 Rinse the soapy water thoroughly before air drying, so no soap residue remains.
Pro tip: Washing by hand gives you more control to spot clean stains, focus on high-touch areas like paws and snouts, and ensure those stuffy nooks and crannies get cleaned out. While it may be more labor intensive, hand washing allows you to inspect and repair any damage (unlike a rougher machine cycle) to keep your cherished plush pals looking pristine for as long as possible.
👏
Surface clean with disinfectant
If you’re looking for a quick clean that doesn’t require fully submerging or soaking your stuffed animals, grab a disinfectant wipe or spray. Gentle baby wipes work well for light cleaning, while antibacterial cleaners like Lysol will kill up to 99% of surface bacteria. Focus on high-touch areas and anywhere dust and spills accumulate.
This method won’t fully sanitize the inside stuffing, so isn’t ideal for super-germy areas like daycare centers. 👨⚕️ But if you wish to avoid machine washing delicate heirlooms, a light surface clean does away with many germs and freshens things up!
Just be sure to spot test cleaners in an inconspicuous area first and thoroughly air dry to prevent mold growth inside.
Spot clean with rubbing alcohol
For targeted stain removal and germ killing, try some rubbing alcohol (70% isopropyl alcohol solution). 💉 Dip a cotton ball and dab onto problem spots, but avoid soaking the material which can lead to damage. The alcohol evaporates quickly so stuffed animals are left clean, fresh, and dry in no time!
An alcohol bath is another option for a deeper but gentle clean. Mix a 70/30 ratio of water and alcohol in a large container and soak toys for 30 minutes up to a few hours based on severity of soiling. Remove and allow to fully air dry.
The alcohol sanitize soak is also quite effective against dust mites! 👍
Freeze overnight to kill germs
If extreme heat drying would damage your stuffed pals, try the opposite temperature extreme instead – freezing! 🥶 Pop those plushies in a cold bag and freeze overnight, ideally at 0°F, and the frigid temps will kill most germs and insects. Allow to fully thaw before use so no dampness remains inside.
Freezing may need to be combined with additional cleaning methods if toys are heavily soiled. But for a mild refresh, it’s an easy way to disinfect without chemicals or heat. You can even sprinkle in some baking soda before freezing for added odor elimination and freshening power. 😃
When it’s time to clean your well-loved stuffed critters, skip the harsh machine drying and instead opt for more gentle hand washing, disinfecting wipes, spot cleaning with alcohol, or an overnight freeze.
With a little extra care and attention, you can eliminate germs and stains without damaging even delicate toys. 🚫🦠
Storing Clean Stuffed Animals
Let air dry thoroughly after sanitizing
After sanitizing your stuffed animals in the dryer, it’s important to let them air dry completely before storage. Any remaining moisture can encourage mold growth. Lay plush toys flat on towels and allow a few hours for drying before putting them away.
Fluff filler occasionally as it dries to prevent clumping.
Keep dust-free in sealed bins or bags
Sealed plastic bins or bags help keep clean stuffed animals free of dust and dirt between uses. Choose sealable containers large enough to avoid compression that could damage toys. Clear storage totes allow viewing contents while protecting from contamination.
For bag storage, use breathable cotton, microfiber or mesh laundry bags. Regularly washing storage containers also reduces dust buildup over time.
Wash bedding and cases regularly
For plush toys kept on beds, wash their cases or bedding weekly to prevent transferred oils and dirt from humans affecting the stuffed animal condition. Choose a mild laundry detergent on cold and tumble dry low if the toy itself can’t be routinely sanitized.
This keeps them fresher between monthly cleanings. It’s best to store bedroom plushies sealed when not in use.
Avoid moisture and direct sunlight
Prevent stuffed animal damage by storing containers away from moisture, heat and sunlight. For example, avoid attics, basements and garages which can experience temperature extremes. Direct sun exposure can fade fabrics and break down materials over time.
The best storage places are closets and shelving inside temperature-controlled living areas. Regularly inspect containers for pests also and shake out toys to redistribute filler if needed.
| Stuffed Animal Storage Tips | Benefits |
| Let air dry completely after sanitizing | Prevents mold growth |
| Use sealable plastic bins or breathable bags | Keeps clean and dust-free |
| Wash bedding weekly | Removes oils and dirt transfer |
| Avoid temperature extremes and sunlight | Protects fabrics and materials |
Following these simple stuffed animal storage guidelines helps prolong toy lifespan so they can remain usable and safe for kids over many years. With some periodic cleaning and containment between uses, plushies can provide security and enjoyment for generations!
Conclusion
With some prep work and the right dryer settings, you can safely sanitize most stuffed animals at home. Pay attention to the materials and construction to prevent damage.
Sanitizing stuffed friends regularly will help remove allergens, freshen them up, and keep them looking their best for years of love and enjoyment.