Installing safety eyes is a critical step when making a stuffed animal or toy. Getting this right ensures secure attachment of the eyes while also preventing harm or choking hazards. If you’re short on time, here’s a quick answer: choose the right size plastic safety eye, mark placement, use pliers to squeeze the washer portion of the eye through the fabric securely.
Read on as we fully cover picking eye size and types, marking placements, squeezing tools, and extra safety tips when installing safety eyes for a foolproof stuffed animal.
Choosing the Correct Safety Eyes
Plastic vs Glass Eyes
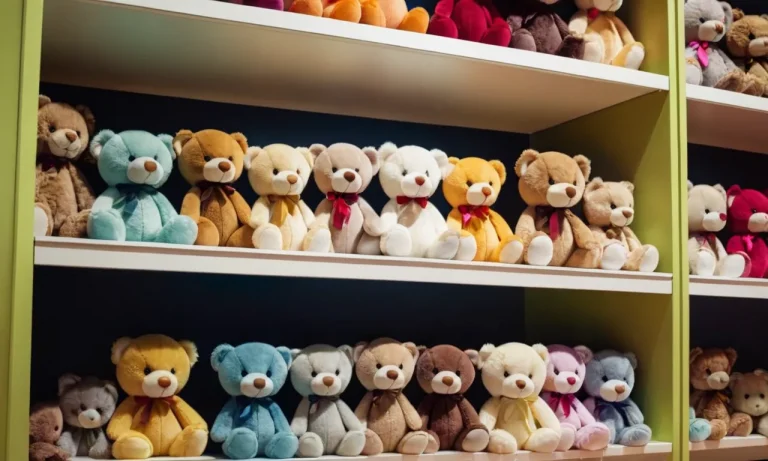
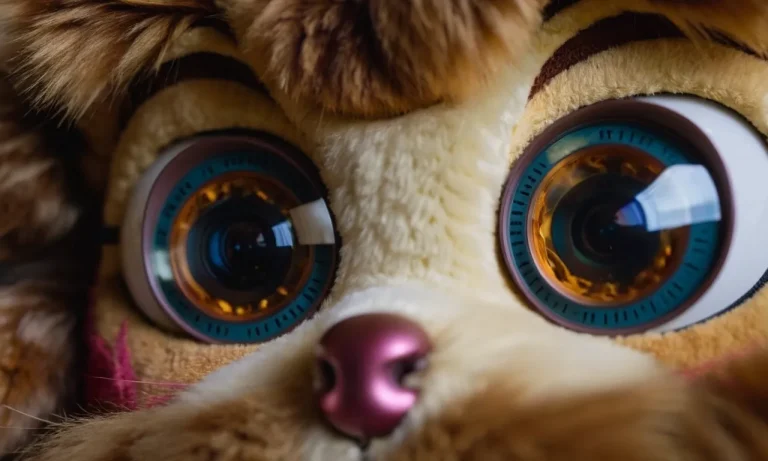
When selecting safety eyes for your stuffed creations, you’ll first need to decide between plastic or glass options. Plastic safety eyes are lightweight and affordable, while glass alternatives provide more realistic detailing and shine.
Plastic eyes come in fun colors like emerald green or ocean blue for a whimsical look. Glass safety eyes better mimic the sheen of real eyes, but cost more.
Both plastic and glass safety eyes meet toy safety standards like ASTM F963 when properly secured. Make sure any safety eyes you buy have backings to prevent detachment and present a choking risk. Some factors to consider:
- Plastic safety eyes range from $1-$5 while glass eyes cost $5-$15 on average.
- Plastic is lightweight; glass has more heft and feels realistic.
- Glass offers more color depth and sheen for a lifelike look.
- Glass eyes should be glued in place for security; plastic may use washers.
Evaluate project size, realism needs, toy use, and budget when deciding between materials. A plush decor accent can suit plastic while glass fits a collectible display doll better. While less common, some brands offer handpainted safety eyes for an customizable high-end appearance.
Safety Eye Sizes
Safety eyes for stuffed animals come in a spectrum of sizes like 5mm, 7mm, 10mm, 12mm, 15mm, and 20mm options. Size availability depends on material (plastic or glass) and specific brand products. Measure twice to determine the proportions that suit your project.
For reference, some standard stuffed animal eye sizes are:
- Small plushies like finger puppets: 3-4mm eyes
- Medium plushes around 10-12 inches tall: 7-10mm eyes
- Large teddy bears and lifelike dolls: 12-22mm
Oversized eyes can appear comical while undersized may look odd. Striking the right balance depends on the overall look you want. Test different eye sizes against the pattern initially to see how they complement the face.
Washers and Backings
Washers and backings keep safety eyes securely fastened to prevent any choking hazard. Plastic eyes designed for hand sewing often come with accompanying washers while glass eyes get glue-on backings instead.
| Washers | Backings |
| – Built to lock with plastic posts behind eye | – Adhere to glass eyes with strong craft glue |
| – Range from flat plastic to decorative metal | – Offer open rings or solid circular shapes |
| – Add color or style complementing the eye | – Materials like plastic or metal available |
| – Include tab connectors for eye positioning | – Extra insurance against safety issues |
Follow manufacturer’s instructions carefully when attaching washers or backings to keep safety eyes secure. Proper positioning aligned with the direction of the eye is also key for realism and function. Rotate or tweak until both sides have symmetry and depth.
Marking Eye Placement
Properly marking where to place the safety eyes is a crucial first step for any stuffed animal project. Taking the time to measure and mark the locations accurately will ensure your stuffed critter has eyes that are evenly spaced and aligned, giving it maximum cuteness and personality.
Start by gathering your marking tools – a washable marker or fabric pencil works great. Lay your stuffed animal piece flat and using a ruler, measure and mark dots to indicate the center point between where you want the eyes placed. An average eye span distance is 1.5-2 inches apart.
But feel free to adjust depending on the size and proportions of your stuffed animal.
Be sure to double check your measurements, spacing and alignment before proceeding. Uneven eyes can really throw off the look of your stuffed pal. And don’t worry about making mistakes – that’s why we use washable markers! You can simply wipe away any unwanted marks when you’re done.
Here are some quick tips for optimal eye placement:
- Eyes closer together give a cute, baby-like appearance
- Wider set eyes make animals look more mature and prideful
- Place eyes above the horizontal midline for perkier expressions
- Droop eyes below the midline for sleepy, sad or goofy looks
Get creative and have fun with different spacing and positions until you find the perfect friendly (or cross-eyed!) face for your furry friend. Proper planning and marking ahead of time makes attaching the safety eyes smooth sailing!
Installing the Safety Eyes
Using Pliers or a Setting Tool
When installing safety eyes, pliers or a setting tool can make the process easier. The tool is designed to securely grip the washer behind the safety eye and snap the prongs closed. Here are the steps:
- Place the first part of the safety eye with prongs facing up on the stuffed animal in the desired location.
- Take your pliers or setting tool with washers attached and fit it around the prongs.
- Squeeze the handles together to bend the prongs around the washer and securely clip it into place.
- Repeat the same process for installing the second eye, matching the position of the first one.
Using pliers ensures even pressure when closing the prongs. Got2bGlued offers affordable eye setting pliers that work with most safety eye designs. Always take care not to over-squeeze and damage the eye.
Extra Pressing for Security
Though the pliers securely set the washers and eyes in place, some extra pressing provides durability:
- Place the stuffed animal on a hard, flat surface like a table.
- Lay a book or other heavy flat object over one eye.
- Press down firmly for 30 seconds to further flatten prongs.
- Repeat for the other installed eye.
This extra flattening keeps eyes in place despite frequent use and washing. Edmunds Crafts recommends also applying hot fix adhesive around the eye edges. Before final attachment, test eye placement with pins first.
Overall, take your time installing safety eyes correctly, and they will bring stuffed animals to life for years.
Safety Tips
Checking Snugness
Properly checking the snugness of safety eyes is an essential safety tip, as loose eyes can detach easily and pose serious choking hazards for kids or pets. After attaching the eyes, always pull on them firmly to ensure they are completely secured.
You can also lightly shake your stuffed animal to test the eye stability. It’s recommended to apply a bead of glue around the edges of plastic safety eyes or sew a line through the fabric and peeking out of either eye hole as an extra precaution for sensitive groups like babies or toddlers.
Furthermore, consider limiting decorative features like eyes or buttons on keepsakes intended for very young children due to their tendency for placing objects in their mouths.
As a guideline, the U.S. Consumer Product Safety Commission recommends avoiding buttons, eyes, or other small embellishments on toys for kids under three years old.
Using Adhesives
When selecting adhesives for safety eye application on stuffed animals, quick-bonding multi-surface glues provide durable and safe adhesion. For optimal results on furry or textured fabrics, Gorilla Crystal Clear Multi-Purpose Glue and Aleene’s Tacky Glue are top choices for their superior strength, flexibility, and ease of use.
Both are versatile, non-toxic when dry, and resist weathering over the years in case of outdoor exposure.
When working with adhesives around sensitive groups, avoid instant “super glue” adhesive cyanoacrylates which give off harsh chemical fumes. As an extra safety precaution for kids or pets, consider sealing the finished project with a child-safe water-based sealer like Mod Podge Kid’s Sealant to deter chewing of the eyes or surrounding fabric.
Conclusion
Attaching safety eyes properly ensures they are securely fastened while not posing safety risks. By choosing the right eye size and type, thoughtfully marking placement, tightly squeezing the post through the fabric with pliers, and extra safety steps like gluing, you can confidently add safety eyes to stuffed animals and toys.