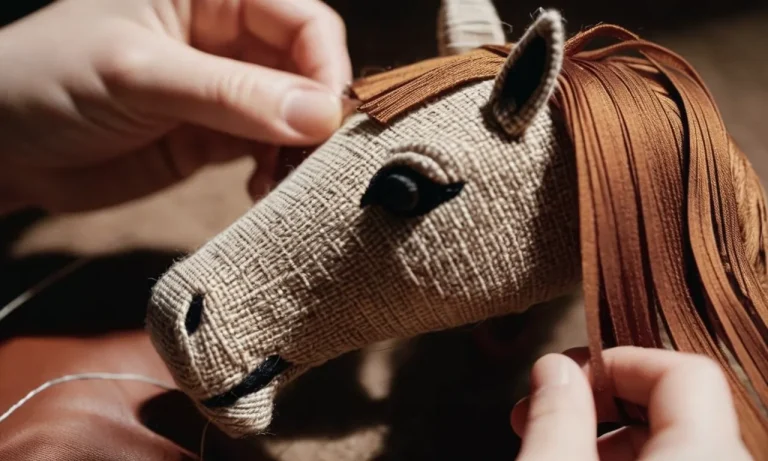
Have you ever wanted to add a personal touch to a stuffed animal? Embroidering by hand is a fun way to customize it with special designs and your own creative flair. Whether you’re a beginner embroider or have some experience, hand embroidering stuffed animals is an achievable and gratifying craft project.
If you’re short on time, here’s a quick answer: choose and mark placement for your designs, hoop your fabric, transfer designs onto the fabric, create an embroidery stitch outline, fill in with satin stitch embroidery.
Choosing and Preparing Your Materials
Selecting your stuffed animal
When selecting a stuffed animal to embroider, opt for one made of soft fabrics like fleece or flannel that will be easy to stitch through (avoid plush stuffed animals). The size you choose depends on your ambition and skill level – a smaller stuffed animal like a Beanie Boo is great for beginners.
Look for stuffed animals with large solid color areas, which give you room to get creative with your embroidery floss. Lastly, make sure to pick a stuffed animal you feel an attachment to – you’ll be spending a lot of quality time personalizing it!
Embroidery hoops vs. holding the fabric
An embroidery hoop will keep your stuffed animal’s fabric taut while stitching intricate designs. But you can easily embroider simple designs by holding the fabric taught with your non-dominant hand. Here’s a comparison:
| Embroidery Hoops | Holding the Fabric |
| – Keeps fabric in place | – Doesn’t require extra tools |
| – Allows more intricate designs | – Better for simple designs |
| – Can leave hoop marks | – Harder on your hands |
If opting to use a hoop, choose a small 4-6 inch one. Be sure to place a layer of water-soluble stabilizer underneath the fabric in the hoop to prevent hoop marks.
Needles and embroidery floss
You’ll need an embroidery needle (with a blunt tip and larger eye) and embroidery floss. Cotton floss has a silky sheen that looks great on stuffed animals. Purchase single skeins instead of bundles to pick unique color combos. Consider splurging on hand-dyed variegated floss for organic coloring.
Lastly, don’t forget to keep a small, sharp embroidery scissors on hand! Check out DMC’s website for inspiration choosing colors.
Planning and Transferring Your Design
Choosing embroidery placement
When embarking on a hand embroidery project for a stuffed animal, one of the most important planning steps is choosing the embroidery placement. Think about which parts of the animal will be visible and prominently displayed once the piece is complete.
Often, the face or chest area offers great visibility and provides a creative focal point.
Consider leaving parts of the animal plain as well for visual contrast against the detailed hand embroidery. This might be sections like the back or underside that won’t normally be seen. Strategic negative space helps highlight the embroidery! 👍
Transferring designs with transfer paper
Once your design is finalized, use transfer paper like Saral or Dressmaker’s Carbon Paper to transfer it cleanly onto the fabric. Pin your paper and fabric sandwich together so it doesn’t shift during the tracing process.
Use a stylus to firmly trace over all lines of the design, applying even pressure. Carefully lift the paper away to reveal a basic imprint of the graphic below!
If lines look faint, carefully go over them again with a fine tip marker prior to beginning your stitches. This helps properly guide your embroidery placement. Some helpful transfer paper brands according to embroidery artists on Needle ‘n Thread include FriXion by Pilot and Clover Chacopy.
Freehand drawing designs
Feeling extra creative? 🤩 Try your hand at freehand drawing embroidery designs directly onto your stuffed animal’s fabric. Allow your imagination to roam wild with abstract shapes or illustrative doodles. This makes for a fun spontaneous project.
First, lightly sketch out concepts in pencil so you can refine them before inking permanent lines. You can also try washable fabric markers to start. When you have your final motif, outline everything neatly with a fine tipped permanent fabric pen or acrylic paint OUTLINER brush pen.
Let dry fully before beginning your stitches!
Stitching Your Design
Creating an outline with split stitch
The split stitch is a great way to outline your design before filling it in. Unlike a traditional outline stitch, the split stitch gives you a ridge that adds dimension and separates the outline from what you will fill in later. To create this outline:
Going slowly here ensures nice, even split stitches for a professional embellished look on your stuffed pal! 👍
Filling in designs with satin stitch
The satin stitch makes for beautiful filled shapes on your plushie. To fill in areas neatly:
Going in slow, straight motions helps prevent uneven bunching. Take your time and don’t pull too tight on the thread so you can easily adjust stitches or undo small mistakes.🙂 This will result in sleek, professional satin fills every time!
| Stitch Type | Best Uses |
|---|---|
| Satin stitch | Large filled shapes and areas |
| Split stitch | Outlines and borders |
Adding dimension with other stitches
Don’t be afraid to get creative with stitch types too! Here are some that add awesome texture:
Combining stitches like knots, loops, and braids with your main satin fill will make your stuffed bestie really stand out! The stitching possibilities are endless. 🤗 Check out tutorials from sites like Needle ‘n Thread to learn new techniques.
With some practice, your custom creature will look store-bought in no time. Just take it step-by-step and don’t worry about mistakes along the way – that’s part of the fun and learning!
Finishing and Displaying Your Embroidered Stuffed Animal
Once you have finished embroidering your stuffed animal, there are a few final steps to complete your project. First, make sure to tie off and trim any excess thread so there are no loose ends (this helps give your project a neat, polished look).
Next, gently hand-wash the stuffed animal using a mild soap to remove any dirt, oil, or traces of pencil from the fabric. Lay flat or hang to dry completely.
Now it’s time to stuff your embroidered creation! Use a good quality poly-fil stuffing material and fill the animal firmly, but make sure not to over stuff. Take your time with stuffing to avoid lumps or protrusions that could stretch the fabric.
This article provides helpful tips for properly stuffing stuffed animals.
Once stuffed, hand sew the opening closed using small, neat stitches. Make sure the seam is secure so the stuffing does not leak out with use over time. You may choose to add extras like safety eyes, ribbons, or other decorative elements. Be creative and have fun customizing your stuffed critter!
Displaying Your Hand Embroidered Creation
Finally, it’s time to find a special spot to display your embroidered stuffed piece. There are many creative ways to show off your new work of art:
- Sit it on a shelf, dresser, or table so guests can admire your beautiful needlework
- Hang on the wall in a shadowbox frame or floating shelf to highlight the details
- Tie onto a purse or bag using a ribbon to take it on the go
- Give as a heartfelt handmade gift to a special child or friend
No matter how you choose to show off your embroidered stuffed critter, be proud of the time and care you put into your project. The personal touches of hand embroidery and stuffing really make it special (much more meaningful than any store-bought stuffed animal!).
We hope you enjoyed learning how to hand embroider and look forward to your next crafty creation.
Conclusion
Hand embroidering stuffed animals unleashes creativity while producing a customized, handmade gift. With some planning, material preparation, and basic embroidery stitches, you can make your plush toy truly one-of-a-kind.
The resulting heirloom quality stuffed animal will delight children and adults alike for years to come.