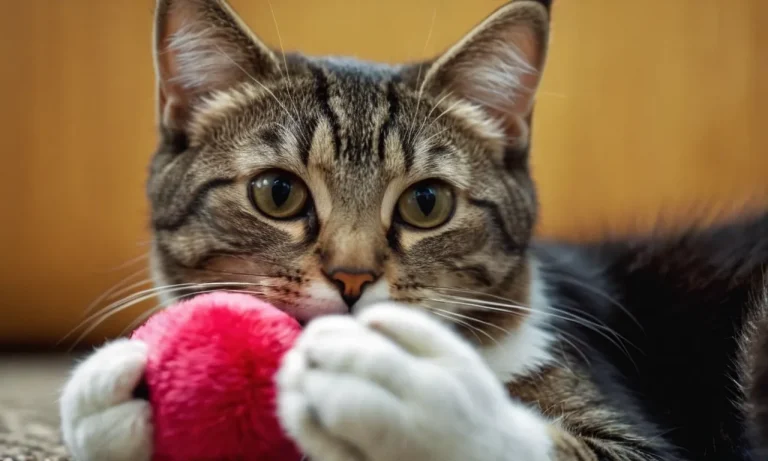
Has your child’s favorite stuffed animal lost its fluff after an accidental tumble in the dryer? Don’t worry – with some TLC, you can restore your stuffed friend’s fur to its original soft glory. If you’re short on time, here’s a quick answer: Brush the fur, spot clean any stains, use fabric softener and conditioner to restore fluff, and avoid putting it in the dryer again.
In this comprehensive guide, we will walk through several methods to renew matted fur, remove lingering odors, and protect your stuffed animals going forward so you can avoid this headache down the line.
Assess the Damage from the Dryer
Check for stains
After accidentally tossing your favorite stuffed animal in the dryer, carefully inspect its fur for any stains left behind. Heat and friction can set certain substances like food or dirt into stubborn marks.
Gently brush back the fur in different spots to uncover hidden stains lingering under the fluff. If you spot discoloration from things like juice, mud, or makeup, don’t fret – we’ll cover effective methods for removing them later.
Test fur texture
While checking for stains, run your fingers through the fur to test its texture. Dryer damage often leaves fur feeling crispy or brittle. See if the fibers seem delicate or if any sections feel hardened from excess heat.
Pay special attention around seams, eyes, ears and the snout since those finer details get blasted with hot air. If you discover crunchy patches, try gentle brushing first to revive the fluff. For truly fried sections, carefully trim with small scissors.
But don’t worry – we’ve got tips for restoring softness coming up!
Inspect seams
Giving your fluffy friend a hug, carefully check its seams and stitches for any loosening after the unwelcome tumble. Areas like the neck, limbs, and tail often take a beating. Gently stretch the seams to test their durability after getting blasted by extreme temps.
If you spot gaps, fraying or ripped threads, you’ll need to mend them so stuffing doesn’t spill everywhere. But don’t stress – later we’ll suggest the best methods and materials for DIY repairs to save your snuggly companion.
| Issue | Quick Fixes | Long-Term Solutions |
|---|---|---|
| Stains | Surface cleaning with soap and water | Spot treat with stain removers or take to the dry cleaners |
| Crispy fur | Gently brush and use fabric softener | Give fur a vinegar rinse to restore pH balance |
| Loose seams | Add extra stitches to secure seam | Carefully restuff and sew up holes for durability |
As seen above, common issues like stains, damaged fur, and ripped seams can often be fixed with some clever solutions. In severe cases, you may need to consult a professional cleaning service or stitchery repair shop.
But don’t get discouraged – with a little TLC, your snuggly friend can make a full comeback!
Key Resources
For extra tips, here are two great guides on restoring stuffed animals:
- Plushie First Aid: How to Repair a Well-Loved Stuffed Animal – DIY repair lessons from Make Magazine
- How to fix a stuffed animal with broken seams and other common issues – Stuff animal rehab advice from Today Show lifestyle site
Groom Fur to Restore Fluff
Use a slicker brush
A slicker brush is a must-have tool for restoring your stuffed animal’s fur after a run through the dryer. The fine wire bristles will help lift and separate the matted fur to bring back some fluff and volume. Gently brush the area in different directions to lift the nap of the fabric.
Focus on areas like the head, belly, arms and legs that tend to get flattened. Take care not to brush too hard on delicate fabrics or features like plastic eyes.
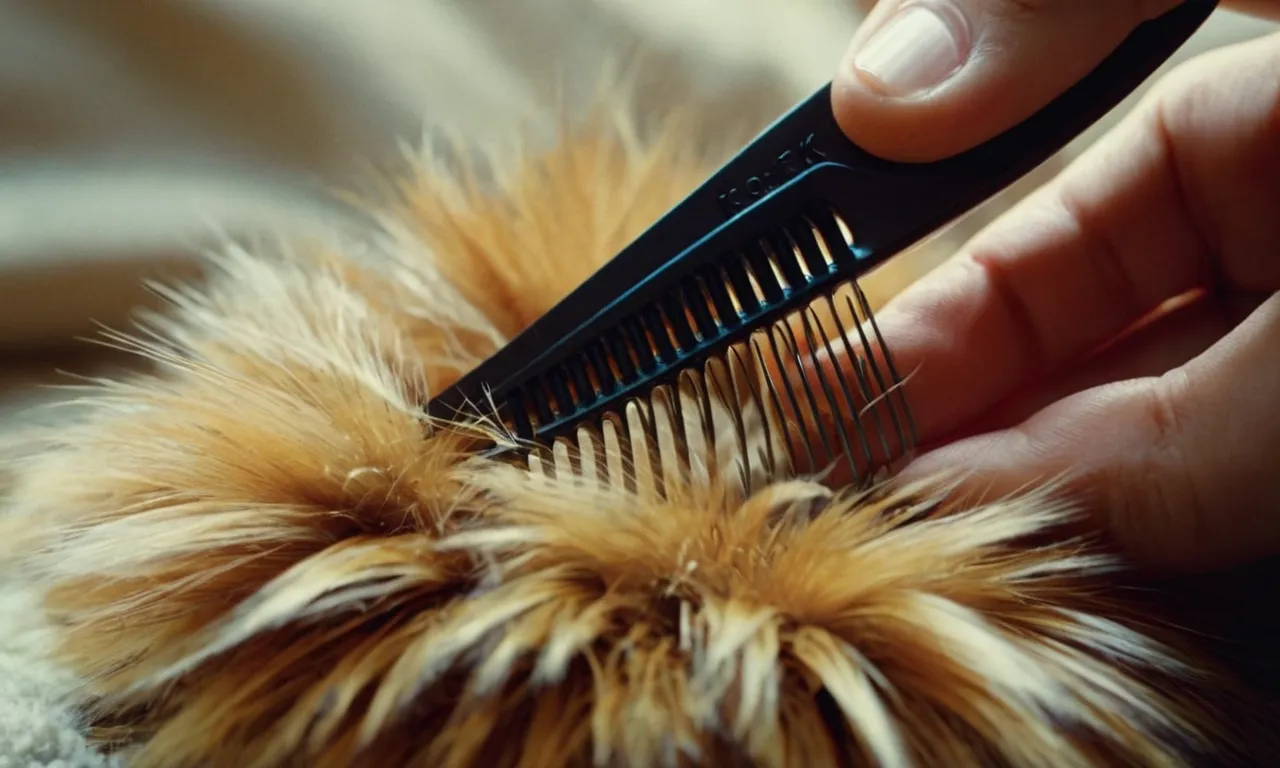
Try a pet comb
For a more gentle approach, use a wide-toothed pet comb instead of a slicker brush. The teeth will gently detangle and smooth the fur. This works well if the toy is lightly matted or the fabric is fragile. Carefully comb in the direction of the nap.
Finish by using your hand to fluff up the fur in the natural direction of growth. A pet comb is also great for spot grooming areas like the face that you want to handle delicately.
Spot clean stains
If your stuffed friend took an unexpected bath in the washing machine, there may be some soap or dirt stains left behind. Luckily, these often come out with some spot cleaning. Mix a small amount of gentle laundry detergent with warm water and use a clean rag or toothbrush to gently scrub the affected area.
Be careful not to oversaturate the toy or let it sit wet for long. Rinse the suds, then blot dry with a towel before air drying fully. For tough stains, try blotting with hydrogen peroxide before scrubbing. With some TLC, you’ll have that stuffed animal looking fluffy again.
By using these techniques, you can restore the soft, huggable texture of a cherished stuffed toy. It may take some time and patience to brush out matted fur or clean stubborn stains, but the results will be worth it. Your furry friend deserves some pampering after surviving the dryer!
Freshen Up with Fabric Softener
Dilute softener
The first step when using fabric softener on stuffed animals is to dilute it properly. Fabric softeners contain chemicals that can be harsh on delicate materials if used in high concentrations. A good rule of thumb is to mix 1 part fabric softener with 4 parts water.
This gentle dilution will freshen up the stuffed animal without damaging the fibers or causing buildup.
Soak the stuffed animal
Once the fabric softener is properly diluted, pour it into a sink, bucket, or basin large enough to submerge the stuffed animal. Carefully place the stuffed toy into the liquid, ensuring it is fully soaked. Let it soak for at least 30 minutes up to a few hours.
This allows time for the refreshing scent and softening properties to fully penetrate the fibers.The longer the soak, the better the results!
As the stuffed animal soaks, gently squeeze and massage it periodically to work the fabric softener into the material. Pay special attention to any areas that are especially dirty or matted. The agitation will help loosen debris so it can be rinsed away later.
Rinse thoroughly
After soaking comes the important step of rinsing. Rinse the stuffed animal under cool running water until the water runs clear. Make sure to thoroughly rinse all areas of the toy to remove any fabric softener residue.
Leftover chemicals can make fur stiff and crunchy over time, so rinse, rinse, rinse! 👏
Here are some tips for effective rinsing:
- Run water through the toy’s limbs and body
- Squeeze the material as you hold it under the tap
- Use a spray nozzle for targeted washing if needed
Rinsing with vinegar is another great option since it helps remove stubborn residue. Just mix equal parts white vinegar and water and rinse the stuffed animal with this solution. The vinegar smell will dissipate as it finishes air drying.
Once thoroughly rinsed, gently press or roll the toy in a towel to soak up excess moisture. Avoid twisting or wringing, which can damage the fibers. Then allow it to finish air drying completely before use.
The fabric softener soak and rinse will leave that special stuffed friend fresh, fluffy, and ready for more cozy cuddles! 😊
Apply Fur Conditioner
After letting your stuffed animal air dry completely from the delicate cycle wash, it’s time to restore softness and shine to the fur with some conditioning treatments. Using the right products can bring your beloved plushie back to its original glory post laundry day.
Choose a Conditioning Spray
There are a variety of fur conditioning sprays on the market made specifically for restoring stuffed animals and plush toys. When shopping, look for gentle, fabric-safe formulas that won’t damage materials or dyes. Many options also contain a light fragrance for extra freshness.
Some great all-natural picks are Essentials Stuffie Conditioner and Angry Orange Pet Odor Eliminator. Always check product details for safety on synthetic fibers before use.
Apply Generously Over Fur
Once you’ve selected a conditioning spray, be sure to thoroughly coat your stuffed animal’s entire surface. Pay special attention to any areas that feel extra roughness from the drying process. Getting an even coverage is key for complete revitalization.
For best results:
- Lay your plushie flat and start spraying the conditioning treatment across the back and body.
- Gently turn and rotate to coat the head, ears, limbs, and any small details areas.
- Use short spurts when spraying parts like the face and delicate accessories to avoid over-saturation.
Pro tip: Place a towel underneath to catch drips or overspray. Having something absorbent below makes the process less messy!
Let Dry Completely
It’s very important to let the conditioning spray dry fully before touching or interacting with your stuffed buddy. This allows the ingredients to penetrate the fibers for optimal softening and static reduction. Drying usually takes 1-2 hours.
Here are some drying tips:
- Stand plushie upright with arms/legs outstretched for airflow access.
- Use a fan to speed up drying time – just don’t aim it directly at the toy.
- Check for damp spots every 30 minutes until completely dry.
Once your beloved stuffed animal is back to its cuddly glory, fluff up the fur and give it a big hug! Proper conditioning can extend the life of plush materials and make them more durable over time.
Prevent Future Furry Fiascos
Check clothing tags
We’ve all been there – you throw your favorite stuffed animal in the washing machine or dryer without checking the tag first, only to find they’ve come out looking a bit scruffy and worse for wear. Not to worry though – a bit of planning can help avoid a repeat of the furry fiasco!
Before washing any stuffed toys, check the tag for the manufacturer’s cleaning recommendations. Many modern plush toys have tags suggesting they are machine washable – but always check first! The tag may advise hand washing only, or have important instructions like closing velcro fastenings to stop the fluff inside escaping.
Wash gently by hand
When in doubt, give your furry friend a gentle hand wash instead of machine washing. Use cool or lukewarm water and a very small amount of delicate laundry detergent. Allow it to fully soak into the fur, then rinse thoroughly with clean water to remove all suds and detergent – leftover soap can destroy the fur over time.
Be extremely gentle when squeezing water out of the stuffed animal to prevent forcing the seam threads. You can wrap it in a clean, colorfast towel and press gently to absorb excess moisture. Then allow it to fully air dry before brushing the fur – never put wet stuffed animals into a hot drying machine!
Line dry only
Putting stuffed toys of any kind into electric or gas clothes dryers risks damaging the fur and shape. The intense tumbling heat can melt plastic parts, fuse fibers together, and crush the soft filling into felted clumps rather than light fluff. Not exactly the cuddly result you want!
Instead, thoroughly line dry all stuffed animals to preserve their furry good looks after washing. Lay your plush pal flat on top of a clean towel in a warm spot with good airflow, turning occasionally.
The fur may fluff up quite a bit at first – use a pet brush or comb when completely dry to regain that luxurious fluffy coat!
By keeping these handy fur-saving tips in mind, your beloved bedtime snuggle buddies will stay looking cute and cuddly for years. No more stuffed animal fur disasters here! 😊👍 Did we miss any great stuffed animal care tricks? Let us know in the comments!
Conclusion
With some time and targeted TLC, you can renew the fluff and restore luster to a cherished stuffed animal pal. Avoid tossing beloved plush toys that endure a dryer disaster. By assessing the damage, grooming the fur, using fabric softener, applying a conditioning treatment, and taking precautions going forward, you can revive the snuggly texture and playtime memories.
Now that you know how to fix stuffed animal fur after an incidental dryer trip, your little one’s special friend will be good as new. So rescue that plush pup from the depths of the laundry pile, break out the conditioner spray, and renew that childhood treasure before next playdate!