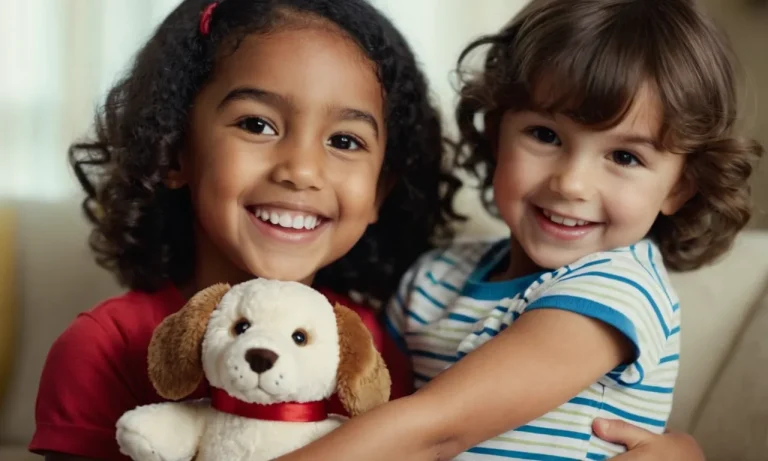
Have you ever wanted to draw your own adorable stuffed animals? Bringing these cuddly creatures to life on paper is easier than you think with the right guidance. In this comprehensive 3000 word guide, you’ll learn foolproof techniques for sketching stuffed animals that look they just leapt off the pages of a children’s book.
If you’re short on time, here’s the quick answer to drawing cute stuffed animals: Start by sketching basic shapes like circles, ovals and rectangles to form the head, body, arms and legs. Refine the outlines and add basic features like eyes and nose.
Use shading, textures and accessories like bows or hats to bring your stuffed creature to life with personality and style. With some practice, anyone can learn how to draw snuggly stuffed animals!
In the sections below, you’ll find step-by-step advice on sketching stuffed animals covering everything from basic supplies and techniques to adding delightful details like expressions and outfits. You’ll also learn how to give your stuffed creatures more realistic texture and dimension.
Follow along to develop your skills, whether you’re a complete beginner or wanting to take your stuffed animal drawing abilities to the next level.
Basic Supplies and Skills for Drawing Stuffed Animals
Pencil and Paper
The most basic supplies you’ll need are a pencil and paper. When just starting out, beginners should use normal writing pencils (HB or No. 2) as they allow for lighter guidelines that can easily be erased later. Smooth paper that can handle some erasing without damage works best.
Many artists recommend starting with a drawing pad or sketchbook with 50-80lb paper weight. As your skills improve, you can upgrade to artist grade pencils and speciality drawing papers.
Understanding Basic Shapes
Drawing stuffed animals relies heavily on understanding basic shapes like circles, ovals, rectangles, and triangles. For example, the body can be an oval shape while ears and limbs may be more angular. Take time to practice sketching these elemental forms using smooth, confident strokes.
Observe the forms of real stuffed animals to understand how these shapes fit together to create whimsical plushes. Using basic shapes as a guide will allow you to more accurately draw stuffed animals from your imagination!
Learning to See Contours and Proportions
Closely observe and compare the contours and proportions of stuffed animals to achieve a convincing lifelike quality in your drawings. Notice relationships like:
- The eyes are typically about halfway down the head
- Limbs attached at the seams are approximately the same width as the body
- The nose protrudes slightly farther than the lowest facial contours
Practice sketching stuffed animals using proportional guidelines. For example, divide the body vertically into thirds to place the eyes and nose. Take time to carefully capture the form of snouts, ears, tails and limbs to convey an adorable and cuddly quality.
Mastering proportional relationships is key for realistically drawing cute stuffed critters from imagination!
With some basic supplies, an understanding of elemental shapes, and a knowledge anatomical contours, even beginners can learn to draw cute stuffed pals. Check out popular instructor books and online drawing tutorials for more stuffed animal drawing tips!
How to Draw a Basic Stuffed Animal Body
Step 1: Sketch a Circle for the Head
When beginning your cute stuffed animal drawing, always start with the head shape. For most stuffed animals, you’ll want to sketch a nice round circle to represent the head. This will act as the foundation for building out the rest of your plushie pal.
Use a pencil and light hand at first – that way, you can refine and erase as needed once the basic proportions are blocked in.
Step 2: Add an Oval Body and Limbs
After you have your basic head circle mapped out, it’s time to attach an oval body beneath it. Make sure to leave a bit of space between the head and body for a potential neck. Then, draw some basic limb shapes – rectangles or spheres work well. Don’t stress about perfect proportions yet.
The importance here is getting the main shapes down. As you learn over time, you’ll develop a better eye for stuffed animal anatomy. But for now, loose blobby shapes are A-OK!
Here’s a tip: Use basic geometric shapes like circles, ovals and rectangles to map out your initial sketch. This will help keep things even and organized before adding detail.
Step 3: Refine the Basic Outline and Connect Body Parts
Once the foundation is laid out, you can start refining. Go in and add some definition to give those blobs some shape. For example, use curved lines to slope the oval body into more of a peanut shape. Add indentations around the limbs to give the impression of joints.
Sketch lines between the head and body for the neck, rounding things out. The more you describe each form, the more stuffed animal-like it will become!
Check proportions as you refine. Generally, the head should be fairly large in relation to the body, enhancing that cute, playful look. But don’t overthink it either – there’s no need for precise anatomical accuracy here! Embrace the whimsical nature of stuffed creatures.
Here are some quick stuffed animal proportion tips as a guide:
| – Head is around 1/3 the size of the body |
| – Legs/arms are around 1/4 the size of the body |
| – Feet/hands are around 1/3 the size of the limbs |
For more on drawing cute creatures, check out guides from professional artists on sites like Dragoart and DrawingHowToDraw.com. With a bit of practice, you’ll be doodling adorable plush pals in no time!
Adding Cute Stuffed Animal Facial Features
The Importance of Facial Expressions
A stuffed animal’s facial features bring its personality to life. The eyes, nose, mouth, and other details work together to create delightful expressions that pull at our heartstrings. According to a psychological study, seeing facial expressions, even on inanimate objects, activates specialized brain regions that process emotions.
So by carefully crafting our stuffed animals’ faces, we can make them cuter, funnier, sillier and more lovable.
Drawing Classic Facial Features Like Eyes and Nose
When placing facial features, follow basic anatomical rules to make them look natural. But don’t be afraid to exaggerate sizes and positions for extra cartoonish charm! For example, large round eyes placed low and wide apart can achieve a cute babyish look.
Here are some classic facial features to try:
- Big sparkly eyes with long lashes
- Tiny button noses
- Rosy blushing cheeks
- Upturned eyebrows and smile lines for a cheerful look
Play around with different eye shapes like hearts, stars or circles. Scale the features up or down for variation. Add darling details like freckles, dimples or tiny fangs!
Getting Creative with Features Like Floppy Ears or Snouts
Creatively modifying basic facial features takes your stuffed animals to the next level. Anthropomorphizing animal traits conveys imagination and whimsy. For example, floppy spaniel ears on a dragon or whiskers on a panda bear. Consider these inventive yet cute options:
| Furry snouts | Floppy or perky animal ears |
| Tiny horns or antennae | Big noses with mustaches or markings |
| Sleepy looking eyes | Tongues sticking out |
Break the rules and let your imagination run wild! Mix and match elements until your stuffed creation looks just how you want. The most loveable and cutest stuffed animals are those with faces that could only come from your wildest dreams! 😊🧸💖
Inking and Coloring Your Stuffed Animal Drawings
Outlining with Black Ink
Once you have finished penciling your cute stuffed animal illustration, the next step is to go over the pencil lines with black ink. Using a fineliner or calligraphy pen allows you to create nice clean crisp outlines.
As you trace the pencil consider pressing lighter in areas that you want to erase later, like the highlight areas. Also, don’t forget to sign your fabulous stuffed critter drawing! When outlining, be sure to work slowly and methodically to get smooth lines.
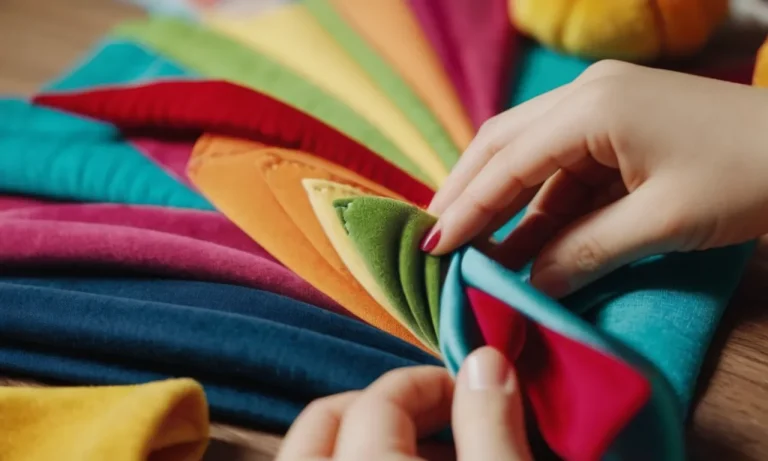
Flat Color vs. Shading
Now it’s time for the fun part – adding color and shading to make your stuffed pal pop off the page! You can keep your stuffed animal coloring simple and clean by using flat colors and avoiding shading. This style works well for graphic illustrations.
Or, you can blend colors, use colored pencils to shade the form, which helps give a more realistic 3D effect. Pay attention to color theory and think about light source direction too. Complementary color schemes like blue and orange or red and green 😍 work great for vibrant stuffed cuties!
Adding Cute Details Like Spots or Striped Patterns
Personalize your stuffed animal drawings with charming details like spots, stripes, tiny hearts or stars. These kinds of patterns can be woven organically into the color and shading for a whimsical touch. For example, on a brown teddy bear you could stencil tiny pink hearts.
Or use rainbow stripes on a multicolored unicorn. Let your imagination run wild! You may also want to revisit your line drawing and thicken some key outlines after coloring is done, to help certain elements pop visually. Have fun making each plush creature totally unique.
Drawing Stuffed Animals from Different Angles
Front View Stuffed Toys
When starting out drawing cute stuffed animals, it’s best to begin with the front view to get the basic proportions down. Sketch a circle for the head, an oval overlapping it for the body, then add the limbs stemming from the body (see examples at ArtistsNetwork.com).
Pay attention to making both sides of the stuffed animal symmetrical. Once you’ve nailed down the basics, have fun adding details like eyes, noses, cute little paw pads, and expressive smiles to give your stuffed creature its own charm and personality! Who doesn’t love an adorable smiling plushie?
Side Profile Stuffed Creatures
After getting comfortable drawing stuffed animals straight on, try switching up the angles for greater visual interest. Experiment with side views to make your creatures look like they are glancing to the side or in motion across the page.
Observational drawing is key here—study your actual stuffed animals from different angles to see how the head, limbs and facial features look. Notice how the elements overlap and connect when viewed from the side perspective.
Pro tip: Don’t forget to show the curve of the back and a slight indent where the bottom meets the surface it sits on.
Experimenting with 3/4 Views
Once you have front and side views mastered, moving on to 3/4 views can breathe even more life into your stuffed creatures. This perspective shows more dimension than the flat front angle but still allows you to illustrate more facial features than a strict side view.
Angle the head, body and limbs at interesting diagonals sloping into space to prevent a stiff flat look. Doing quick 30-second gesture drawings of stuffed toys from all around can help train your eye to capture the 3/4 view with a lively, animated appearance.
With practice over time, you’ll be adept at conjuring super cute stuffed animals from all angles that seem ready to hop off the page 😊
Giving Stuffed Animals More Realistic Texture
Building Dimension With Shading
One of the keys to making stuffed animals look more 3D and lifelike is using shading to build form and dimension. Try shading some areas darker and leaving other areas lighter to create shadows and highlights. This helps make their surface look less flat.
For example, you could shade the underside of limbs or areas in deep folds and crevices to show depth and shape.
When shading, consider your light source and think about where shadows would realistically fall based on that. You can use subtle gradients to transition from light to dark for smooth, gradual shadows. This gives a nice rounded effect, similar to the soft stuffing inside plush toys.
Harder edges with stark shading contrasts will look flatter.
Using Line Hatching For a Stuffed Look
Another handy technique for making stuffed animals seem more 3D and plush is line hatching. This involves filling an area with parallel or crossing lines to build up texture and form. The simple repetition of lines can suggest the fluffy, woven texture of stuffed animal fabrics and fur.
Try varying your line weight and density for interest. Using thicker lines with more space between them in highlight areas helps push those shapes forward visually. Cross hatching lines at different angles can further enhance dimension too.
Just take care not to overwork areas with too many lines or it may start looking messy instead of soft and stuffed.
Coloring for a Plush Fabric Appearance
When coloring your stuffed animals, choose hues that resemble actual plush toy fabrics for a more realistic look. Subtly vary shades across forms using lighter and brighter versions of colors for highlights and dimensional popped areas. This helps make their surface seem less flat.
Using colors that are too perfectly uniform can seem flat and lifeless.
You can also try adding some simple texture patterns or subtle color variations in places to suggest plush woven cloth or printed fuzzy fabrics. For example, you could use gently curving lines on a belly or faint dots on paws.
Keep any patterning soft and low contrast though, as very high contrast or hard-edged patterns may not read well from a distance.
Adding Cute Outfits and Accessories
Bow Ties and Bandanas
A fun way to dress up your stuffed animals is by adding bow ties or bandanas (awesome!). For bow ties, sketch a horizontal line under the animal’s neck and fill it in as a colorful solid or patterned shape, with pointed ends.
The key is getting the angle, size, and positioning just right so it looks dapper on your animal. Bandanas can be tied loosely around a critter’s neck or stuck in its overalls for a farm-ready look.
Consider the aesthetic you want your stuffed animal to convey – a formal, sophisticated look with a bow tie or a fun, playful style with a bright bandana. Let your creative juices flow by mixing up outfits too. Why not have a llama wear both a bow tie
Vests, Dresses or T-Shirts
Vests are another classic way to clothe stuffed animals. It’s usually easiest to draw them from a side view, similar to bow ties, as a flattened shape under the arms. Simple geometric vests work well or get creative with zigzag, diamond, heart, or star patterns.
For t-shirts, sketch a crewneck collar and a box shape below it. Consider having your critter’s t-shirt display a fun phrase!
If your stuffed animal is a female character, dresses are a super cute outfit choice. For a basic effect, draw the critter from a side view with a dress shape fanning out from under the arms. Play with lengths, sleeve styles, or necklines for more flair.
To take the cuteness factor way up, fill the dresses 😊🎉with pretty patterns like polka dots, florals, or hearts!
Hats, Glasses and More
Hats are essential accessories for decking critters out in style. Beanies, baseball caps, and straw sun hats are great options. Position them high enough so the brim doesn’t cover the animal’s eyes. For a porkpie hat or top hat tilted at an angle, make sure facial features are still visible.
Cat-eye reading glasses perched on a nose add an intelligent professor vibe.
Also consider ties, bows, flower crowns, watches, brooches, earrings, scarves, tutus, ribbons, backpacks, belts, socks, boots…the possibilities are endless for jazzing up your stuffed animals! The key is making sure accessories suit the character and let their adorable personality shine through.
Have fun getting creative!
Conclusion
As you can see, with some dedicated practice, anyone can learn how to draw adorable stuffed creatures full of life and personality. Start by following the step-by-step fundamentals on sketching basic stuffed animal shapes, features and textures.
As you build your abilities, get creative adding delightful outfits and accessories to bring out your stuffed animals’ unique charm.
The most important thing when learning to draw cuddly stuffed animals is to have fun with the process and not worry about making perfect images right away. Doodle new creatures whenever you feel inspired, using references if helpful.
With experimentation and guidance from this stuffed animal drawing guide, you’ll be hand-drawing huggable furry friends in no time!