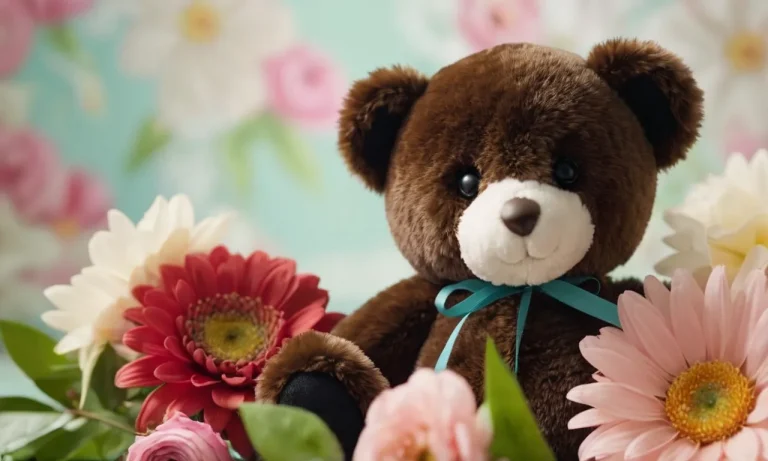
Looking to add personality to your handmade stuffed animals? Giving them expressive crocheted eyes can really make them come to life. If you’re wondering how to add the perfect peepers, you’ve come to the right place.
Want the quick answer? To crochet eyes for stuffed animals, you’ll need yarn and a crochet hook to make eye patches in single or double crochet of the color you desire. Stitch the eyes with smaller black safety eyes in the center for definition and attach to your amigurumi securely with a tapestry needle.
In this comprehensive guide, we will cover everything you need to know about selecting yarn and hooks, crocheting eye patches, attaching safety eyes, and securely adding crocheted eyes to your stuffed animals for a polished look.
Choosing Your Supplies
Selecting Yarn
When selecting yarn for crocheting eyes, opt for a lightweight, smooth yarn in a color that matches or complements your stuffed animal. Good options include:
- Acrylic yarn – Affordable, durable, and available in many colors
- Cotton yarn – Soft, comfortable for a child’s skin
- Wool yarn – Warm, fuzzy, and realistic for animal eyes
Stay away from textures like bouclé or thick novelty yarns, which will make crocheting tricky. Get a few different color options so you can match various stuffed animals perfectly. Most patterns call for a lightweight yarn, like fingering or DK weight.
Choosing a Crochet Hook
Opt for a crochet hook size that matches the weight of your yarn according to the yarn label. If you want tiny eyes, choose a smaller steel crochet hook size between 1.5mm-3.5mm. For larger eyes fitting bigger stuffed animals, try an aluminum hook from 4mm-6mm.
Make sure the hook grabs the yarn smoothly without splitting it.
Some crocheters prefer inline hooks, which have a tapered head instead of the traditional flat hook end. This allows you to poke the hook into tight places easily when stitching eyes. Boye and Tulip both make great inline options under $5.
| Hook Material | Best Use |
|---|---|
| Steel | Extra-small amigurumi eyes |
| Aluminum | Small-medium stuffed animal eyes |
| Plastic | Jumbo stuffed animal eyes |
No matter what hooks you choose, make sure they are smooth and do not snag the yarn. Consider buying a variety pack with multiple sizes so you have different eye options for future stuffed animal projects!
Crocheting the Eye Patches
Making a Foundation Chain
The first step in crocheting eye patches for stuffed animals is to make a foundation chain using your preferred yarn and crochet hook size. It’s best to use a lightweight yarn like worsted weight or DK yarn and a smaller hook size like a size E/4 (3.5mm) or F/5 (3.75mm) to achieve a tight gauge for the eye patches.
You’ll want to chain stitches for the width of the eye patch you desire – usually between 5-10 chains is a good amount.
For a refresher, to make a foundation chain you’ll simply loop the yarn over the hook and draw it through the loop on your hook to make your first chain. Continue looping the yarn over and pulling through to make the desired number of chains.
Try to keep the chains uniform and not too tight or too loose. This foundation chain will serve as the base for your crocheted eye patch.
Working in Single or Double Crochet
Once you have your foundation chain made, you can start crocheting the eye patch. You can use either single crochet or double crochet stitches, both will work well. Single crochet stitches will create a tighter, denser fabric while double crochet is quicker to work up.
To work in single crochet, insert your hook into the second chain from your hook, yarn over and pull up a loop (two loops on your hook). Yarn over again and draw the yarn through both loops on your hook to complete a single crochet. Repeat this in each chain stitch across to create your first row.
For double crochet, yarn over insert your hook into the third chain from the hook, yarn over and pull up a loop (three loops on your hook). Yarn over again and draw through just the first two loops, then yarn over and draw through the remaining two loops to complete a double crochet stitch.
Repeat this in each chain across.
Continue to crochet rows of single or double crochet stitches, working over the foundation chain, until the patch is the size you desire for the stuffed animal’s eye. A good guideline is an eye patch about 1-1.5 inches wide by 1-2 inches tall.
Add additional rows to make the eye patch larger if needed.
When finished with the crocheting, weave in all ends neatly on the wrong side. You can use these crocheted eye patches in a variety of ways when making stuffed animals. A few ideas are:
- Sew them onto the front of stuffed animal faces
- Glue them on as removable/changeable eyes
- Back them with plastic doll eyes from a craft store for more dimension
Have fun exploring different options for attaching your crocheted eye patches! They make cute, customizable eyes for all kinds of handicraft critters. Check out some online tutorials from Handimania and All About Ami for more tips on crocheting and attaching eye patches for stuffed animals.
Adding Definition with Safety Eyes
Safety eyes are a great way to add definition and personality to your crocheted stuffed animals. They are plastic backing pieces with a movable pupil that can be secured to the stuffed animal using a special tool.
Safety eyes are commonly used in amigurumi, which is the Japanese art of knitting or crocheting small, stuffed characters.
Benefits of Using Safety Eyes
There are several key benefits to using safety eyes instead of embroidering or painting eyes:
- They are quicker and easier to attach than hand sewing or painting eyes
- The movable pupil gives the stuffed animal more personality and realism
- A wide variety of sizes and colors are available to match your project
- The plastic backing helps them hold their shape and remain durable
Choosing the Right Safety Eyes
When selecting safety eyes, consider the following:
- Size – Pick eyes that fit the scale of your stuffed animal’s head
- Color – Choose a color that matches or complements the yarn used
- Backing style – Solid plastic backings tend to show less white around the edges
High quality brands like Teddyâ„ ̆ Eyes offer sizes from 3mm to 25mm with a rainbow of color options. Getting the size and shades just right can take a stuffed animal from cute to lifelike.
Placing and Attaching Safety Eyes
Correct eye placement is key for your stuffed friend to look its best. As a general rule, leave at least â…“ inch between eyes and place them about â…” down from the top of the head. Use a special eye setting tool to squeeze the backing pieces into the head, securing them in place.
Insert the pupil piece last to finish.
| Safety Eye Setting Tools | Typical Price Range |
|---|---|
| All-in-one setting pliers | $5 – $15 |
| Single prong setting tool | $3 – $8 |
Take care not to set the eyes too deeply or use too much force, which can cause excess stretching or holes in the head. Watch video tutorials to learn proper technique.
Safety First
While safety eyes enhance crocheted stuffed animals with personality and charm, please use caution when making toys for babies or young children. Detachable plastic backs or pupils present choking hazards for little ones.
Consider embroidering or painting eyes instead for items meant for small children, or be sure to securely reinforce safety eyes with plenty of stitches.
With so many options for stunning and whimsical looks, safety eyes are a crafter’s best friend for amigurumi and more. Just be mindful of age recommendations when gifting crocheted critters to kids!
To shop for safety eyes and tools, check out these top retailers: Teddyâ„ ̆ Eyes, Doll Maker’s Journey, Joann, Amazon, Etsy.
Attaching Crocheted Eyes
Using a Tapestry Needle
A tapestry needle is ideal for attaching crocheted eyes securely to a stuffed animal. Select a blunt-tipped needle with a large enough eye to easily thread your yarn or embroidery floss. Always knot the end of the yarn before beginning to sew to prevent the stitches from coming undone.
First, position the crocheted eyes where desired on the stuffed animal’s face. Then, insert the needle from the inside of the head and out of one of the eye holes. Pull the yarn all the way through. Next, insert the needle back through the other eye hole, again from the inside of the head.
Repeat this stitch several times, threading the yarn back and forth through each eye hole. This secure cross stitch locks the eyes firmly in place.
When finished sewing the eyes, insert the needle to the inside of the head again and make several concealed knots with the yarn to tie it off securely on the interior stuffing. Finally, use sewing scissors to trim off any excess yarn. Your crocheted eyes are now neatly and safely attached!
Securing Eyes Firmly
It’s important to take measures to ensure loose eyes will not come off a stuffed animal and pose a choking hazard, especially for young children. Here are some tips for attaching crocheted eyes very securely:
- Use strong, durable yarn or embroidery floss rated for heavy usage in crafts
- Make very tight stitches that pull the crocheted eye tightly to the fabric surface
- Reinforce attachment by double-stitching through each eye hole several times
- Knot the yarn multiple times tightly inside the stuffing before trimming excess
| Yarn or Floss | Recommended Types |
|---|---|
| Yarn weight | 4, 5, or 6 |
| Embroidery floss | 6-strand floss |
Some recommended brands of yarn and floss include Red Heart, DMC, and Lion Brand. Check specific product details to ensure suitability for securely attaching accessories like eyes.
You may also consider using Xs of black sewing thread or fine ribbon to create eyes. Simply stitch these materials securely in place in an “X” shape over the stuffed surface using the same method as attaching crocheted eyes.
With some basic tools and proper technique, attaching cute crocheted eyes is a fun way to bring stuffed animals to life. Just be sure to securely fasten eyes on using durable yarn and tight, reinforced stitches.
This prevents safety risks and ensures the eyes stay on so your handmade friend can continue spreading smiles!
Customizing Eye Design
Varying Yarn Color
One of the best things about crocheting eyes yourself is that you can create fun, colorful designs to make each stuffed animal unique. When deciding on an eye color, opt for yarn that complements the color of the animal.
For example, brown or black yarn works well for bears and dogs, while bright blues and greens can look fun on mythical creatures. Don’t be afraid to use multicolored yarn too – this can result in striking, vibrant eyes.
You can also play around with different techniques:
- Ombre eyes: Transition smoothly between two colors in the same eye for a cool effect.
- Striped eyes: Alternate rows in different shades of the same color to add depth.
- Speckled eyes: Use a main color with flecks of a secondary color sprinkled through.
When trying a new eye color or pattern, crochet a swatch first to see if you like the result before working it into your stuffed animal. This saves time and yarn. An added bonus – you’ll end up with fun little eye swatches to use for future makes!
Adjusting Eye Shape and Size
Another way to customize your crocheted eyes is by tweaking the shape and size.
For many stuffed animals, the standard round eye shape works well. But you can easily adjust your technique to create different shapes:
- Almond eyes: Work in shorter rows to create a more oval shape.
- Narrow eyes: Decrease the number of stitches per row for thinner eyes.
- Large eyes: Work additional rounds to end up with bigger eyes.
Making eyes in different sizes can allow you to play around with different facial expressions. For example, wide eyes with rounded tops can make a stuffed animal look excited or surprised. More narrowed eyes may result in a sly or sleepy look instead.
When trying a new eye shape, refer to images of real animals for inspiration. Making the eyes anatomically shaped for the animal you are making will result in the most realistic and aesthetically pleasing effect.
Useful references for eye shapes include:
Conclusion
With the right materials and some basic crochet skills, you can easily make custom, expressive eyes for your homemade stuffed animals. Take your time selecting colors and design elements that will bring out the personality you imagine for each creation.
Don’t be afraid to experiment with different looks either. That’s part of the creative fun of amigurumi!
The next time you need the perfect peepers to make your stuffed critter truly special, remember this guide on crocheting and attaching eyes. Show off your crafty handmade toys with pride in those perfect finishing accents.