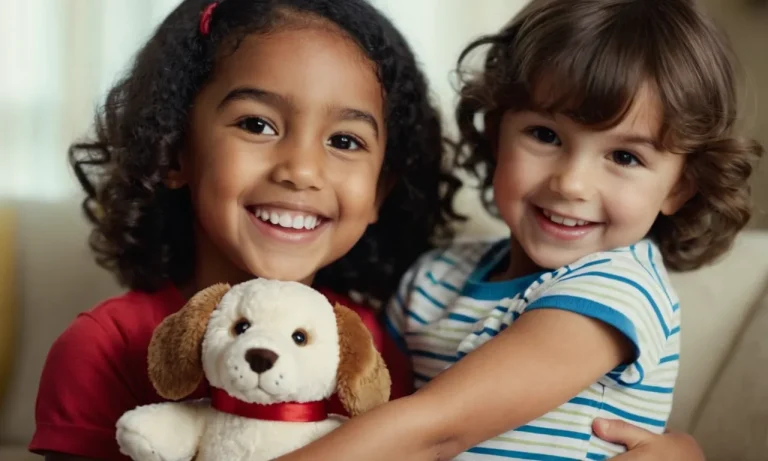
Do you want to create a magical, one-of-a-kind stuffed animal? Crocheting a unicorn is a fun and easy beginner crochet project that results in an adorable addition to any child’s toy collection or whimsical decor.
If you’re short on time, here’s a quick answer to your question: To crochet a unicorn stuffed animal, you’ll need a crochet hook, yarn, poly-fil stuffing, and basic crochet stitches like single crochet, double crochet, slip stitch, and chain stitch.
Follow a pattern or make your own design for the head, horn, body, legs, and mane using distinct yarn colors for a colorful final product.
In this comprehensive guide, you’ll learn everything you need to know to crochet a huggable unicorn including step-by-step instructions, tips for beginners, how to assemble your unicorn, ways to customize your design, and more.
Gather Your Supplies and Choose a Pattern
Crochet Hook
The first thing you’ll need is a crochet hook. The size will depend on the yarn and pattern you choose, but common sizes for amigurumi (stuffed toys) are H/8 (5mm) or I/9 (5.5mm). A too-small hook will result in stiff, dense fabric while a too-large hook creates a floppy toy.
Most unicorn patterns are worked with worsted weight or DK yarn, which pair nicely with these hook sizes.
Yarn
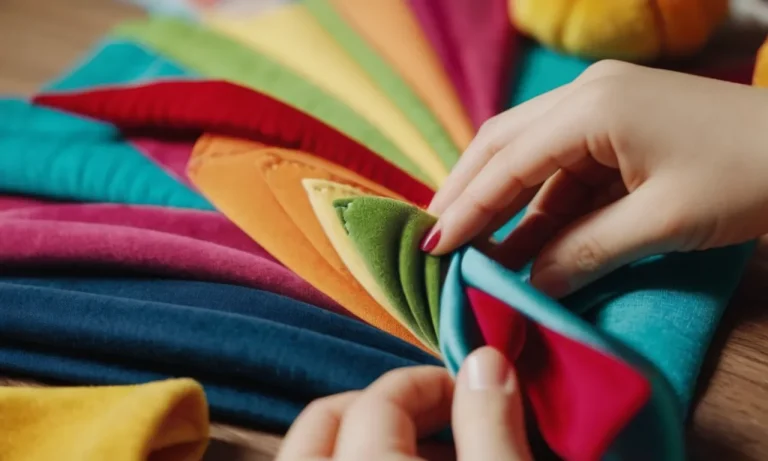
Speaking of yarn, acrylic yarns make great amigurumi because they’re budget-friendly, easy to care for, and hold their shape well when stuffed. Good options include:
- Red Heart Super Saver
- Lion Brand Vanna’s Choice
- Caron One Pound
Choose a main color that matches your unicorn vision, like pastel rainbow shades or even sparkly varieties. You’ll also want a small amount of white for the horn and potentially other colors for the mane, tail, etc.
Poly-Fil Stuffing
The fluffy white stuffing that brings your unicorn to life is usually made from polyester fibers. The amount needed can vary greatly depending on the pattern size and density, but 12 oz/340 g is a good starting point. Tip: Stuff as you go to evenly fill out the pieces.
Embellishments (Optional)
Customize your unicorn with fun embellishments like plastic safety eyes, rainbow wool for the mane and tail, glitter fabric paint for the horn, or decorative ribbons around the neck. Get creative!
Crochet Pattern
Lastly, choose a unicorn crochet pattern that fits your skill level. Many are available for free online. Easier beginner patterns use basic stitches to make small toys with simple shapes. More advanced patterns incorporate detailed appliques, intricate shaping, and specialty stitches for bigger, elaborate unicorns.
Here are a few favorites:
| Skill Level | Pattern |
| Beginner | Mini Unicorn |
| Intermediate | Sparkle Unicorn |
| Advanced | Rainbow Unicorn |
Ready to pick up those hooks and start crocheting your cuddly unicorn buddy? With quality supplies, an engaging pattern, and a bit of patience through those trickier stitches, you’ll be prancing along in no time. 🦄
Learn the Basic Crochet Stitches
Mastering some essential crochet stitches is key to being able to create amazing amigurumi like our cute unicorn stuffed animal. Though it may seem intimidating at first, anyone can learn with a bit of practice! Let’s review the stitches you’ll need to know.
Slip Knot
The slip knot creates the initial loop onto which you can begin crocheting. This tutorial shows you how to tie a secure slip knot that won’t come undone.
Chain Stitch
The chain stitch forms the foundation of most crochet projects. This basic stitch looks like a series of linked loops. Be sure to keep the chains loose – tight chains lead to problems later!
Single Crochet
The single crochet stitch produces a dense, tight fabric ideal for amigurumi. As you insert the hook into each chain and draw up a loop, remember to pull through both loops on the hook to complete each stitch.
Double Crochet
The double crochet looks similar to the single crochet, but involves an extra step to yarn over the hook first. This gives the stitch more height. Double crochet fabric drapes beautifully and works up faster than single crochet.
Slip Stitch
The slip stitch creates an invisible connection between stitches. To work a slip stitch, insert the hook into the stitch, yarn over and pull the yarn through both the stitch and loop already on the hook.
Once you understand these essential stitches, you’ll be ready to start crocheting your precious unicorn stuffed animal. With a bit more practice, you’ll be able to create all kinds of crochet creatures and characters. Crocheting amigurumi patterns is tremendously fun and satisfying.
👍 So grab a hook and some yarn and let your imagination run wild! 🎉
Crochet the Head and Horn
Crocheting the unicorn’s head may seem intimidating, but with some patience it can turn out adorable and magical. Start by making the head base using white or pastel yarn and a 5 mm hook. Chain 6 stitches to begin, then work 16 single crochets into a loop to create the rounded base shape.
On the next round, increase to 24 stitches total for wider head circumference.
Continue crocheting rounds, increasing periodically, until you reach the desired head width and height for the unicorn. For an average sized stuffed animal, make the head about 6 inches tall and 5 inches wide. Feel free to adjust the sizing though to your preference!
Add Facial Features
Once you complete the basic head shape, it’s time for the fun part – adding the facial features! Use black or dark yarn to embroider the eyes, nostrils, and mouth onto the unicorn’s face. Add colorful mane yarn around the base of the head in your preferred rainbow shades.
You can also stitch or glue a cute horn onto the top of the head made from golden pipe cleaner or crocheted spirals.
Stuff Firmly for Maximum Cuteness
When your crocheted head piece is all ready, turn it right side out and firmly stuff with polyfil stuffing. Make sure to pack the stuffing in tightly so the head takes shape and holds firmly when attached to the body.
Add more stuffing than you think is needed – under-stuffing can make projects look droopy. A firmly stuffed head will help your unicorn look its mystical best!
Congrats, you did it! You now have an adorable crocheted unicorn head ready to attach to its body. Pair it with a mane, horn and some ribbon or flowers, and your stuffed unicorn will be looking fabulously magical in no time. Enjoy bringing your new fluffy friend to life!
Crochet the Body
To begin crocheting the unicorn’s body, start by crocheting a magic circle with pink yarn. Make the magic circle tight so you have a solid base on which to build the rest of the body. Then, single crochet 6 stitches into the magic circle.
Join to form a round by slip stitching the first and last stitch together.
Next, you’ll start crocheting in continuous rounds or spiral rounds without joining after each round. To do this, simply start each new round by crocheting into the very first single crochet of the previous round instead of slip stitching to join.
This creates a seamless round that forms the 3D shape of the unicorn’s body.
On the second round, single crochet 2 stitches into every stitch of the previous round for a total of 12 single crochet stitches. Then, on each subsequent round, increase a few stitches evenly spaced until you reach about 30-35 single crochet stitches total.
The exact count isn’t crucial, but having approximately this number will give enough room to stuff the unicorn while keeping it small enough to look cute and cuddly.
After you’ve increased to your desired stitch count, simply single crochet around without increasing for 8-10 more rounds. This will form the body shape of the unicorn. Check periodically that it looks rounded and will be big enough to stuff.
Add or remove rounds as needed until you have the size unicorn body you want.
Stuff the Unicorn Body
Once your crocheted unicorn body rounds are the desired length, you’ll want to stuff it before closing it up. Use a fiberfill stuffing or some other soft stuffing material. Firmly pack the stuffing into the crocheted shell, ensuring there are no gaps.
When the whole crocheted body feels firm with stuffing, it’s ready to close. Single crochet the remaining live stitches together to fully close the opening. Weave in your yarn end inside the body and trim any excess tails.
Add Details to Finish
To complete your unicorn’s body, consider adding some cute details! For example, you could stitch or glue on a rainbow mane flowing from the neck made from yarn or faux fur. A sparkly horn can be crafted from felt or foam and attached to the top of the head.
There are lots of possibilities for adding unique magical touches to your adorable new stuffed friend!
For more tips and video tutorials, check out the guide on How to Crochet a Unicorn Stuffed Animal at The Spruce Crafts website.
Crochet the Legs
Now is the time to crochet the four legs 👣 that your cuddly unicorn friend will use to prance around! Legs are an important part of any stuffed animal pattern 🧶, providing the necessary support for the body and giving it some height.
Before getting started, make sure you have your yarn, crochet hook, and stuffing ready to go! Let’s delve in to stitching up adorable unicorn legs that are sure to delight.
Choose the Right Yarn
Selecting the perfect yarn is key for fab unicorn legs! We recommend using a soft medium weight 4 yarn, which is lightweight enough to enable mobility but durable enough to hold its shape through countless gallops and prances. A few great options include:
- Lion Brand Wool-Ease Thick & Quick Yarn
- Caron Simply Soft Yarn
- Red Heart Super Saver Yarn
Make sure you have enough yarn in the main color used for the body, which will seamlessly blend the legs into the rest of your magical creation.
Stitching the Foundation
We’ll begin crocheting at the hoof and work our way upward. Using your yarn and selected hook, make a magic loop. Into this magic loop, stitch 6 single crochet stitches. This will complete Row 1. Pull the tail tight so no hole remains in the center—we want a sturdy flat base to support our unicorn!
For Row 2, stitch two single crochet stitches into each of the previous 6 stitches for a total of 12 stitches. For Row 3, alternate between one regular single crochet stitch and one stitch increased by crocheting two into one across all 12 stitches.
This single crochet increase will bring you up to 18 stitches total. For Rows 4 and 5, simply complete one regular single crochet stitch across all 18 stitches.
Shaping the Legs
The work above establishes our hoof shape. Now we’ll begin tapered increases moving up to shape the main part of the leg. For Row 6, repeat the increase pattern from Row 3. For Row 7, make one single crochet stitch across all stitches, without increasing or decreasing.
Repeat Rows 6 and 7 until you reach the widest point you want for the top of the legs.
Most patterns widen to around 35-45 stitches at most for standard stuffed animal legs. Try your leg on as you shape it to ensure your unicorn will sit properly. Finish with a few rows of regular single crochet (no increase or decrease).
Complete the Set
At this point our first leg is complete! Take a moment to admire your work before seamlessly creating three more matching legs. For the perfect amigurumi 🧸 figure, symmetry is key. Once all four legs are completed, carefully stuff each one firmly with stuffing to hold the shape.
Attach legs using either a whip stitch or ladder stitch, taking extra care to anchor them securely into the body to withstand the test of time and love.
Before you know it, your darling unicorn’s legs will be cantering around bringing whimsical joy! Those exquisite customized legs you have so meticulously crocheted are sure to be the envy of stuffed animals everywhere 😊
Crochet the Mane
The mane is one of the most important parts in giving your crochet unicorn its magical, whimsical look. You want it to be big, bold, and full of volume. For the best effect, use a bulky weight #5 yarn in a bright, vibrant color that pops.
We will be crocheting the mane using the loop stitch, which creates beautiful tubular pieces of fabric perfect for shaggy hair. Here are the steps:
- Attach yarn at base of neck where you want the mane to begin.
- Chain about 30-40 loops (or desired mane length). The more chains, the longer and fuller the mane.
- In second loop from hook, insert hook and pull up a loop. You will have 2 loops on hook.
- Yarn over and pull through those 2 loops to complete first single crochet.
- Insert hook into next chain and repeat steps 3-4 down entire length of chain. You are essentially working one single crochet into each chain, but in a way that creates long, beautiful loops on one side.
When you finish single crocheting into the last loop, fasten off leaving a long tail for sewing. Take this long, tubular piece and stitch it along the base of the unicorn’s neck using a yarn needle. Fluff out the loops and arrange them so they stand up and out, encircling the whole neck.
You should have a full, shaggy mane sprouting in all directions.
If you want your unicorn’s magical locks to be extra huge and voluminous, repeat this entire process 2-3 times, making multiple long lengths of loop stitched fabric. Sew them stacked up around the neck for extreme fullness and shape.
Once your fabulous, gravity-defying mane is stitched in place, give it one final fluff and shape it with your fingers. Feel free to trim uneven pieces if needed. And there you have it – a legendary, magical mane worthy of any fairy-tale creature!
Mane Styling Ideas
Unleash your creativity when it comes to styling your unicorn’s luscious locks! Here are some fun ideas to try:
- Braids – For a whimsical look, braid different sections of the mane.
- Flowers and Bows – Weave in fabric flowers or bows for an ultra-girly style.
- Glitter Hairspray – Mist the mane with temporary color hairspray to add some sparkle.
- Ribbons – Tie ribbons around sections of the mane for a rainbow effect.
The options are endless when dressing up your unicorn’s magical hair. Have fun and let your imagination run wild!
Assemble Your Unicorn
Once all the pieces of your adorable unicorn stuffed animal are crocheted, it’s time to put them together! Assembling the pieces is fun and rewarding as you watch your creation come to life.
Attach the Legs and Body
Start by attaching the legs to the body. Use a yarn needle and the same yarn you used to crochet the pieces to whip stitch the gaps closed between the legs and body. Go slowly and take your time here to get the legs positioned just right.
Add the Mane and Tail
Next, pin the mane and tail in place on the body to decide exactly where you want them positioned. Play around with different placements until you find the perfect spots. When ready, use yarn scraps to stitch them securely in place.
For an especially magical touch, braid some glittery tinsel or ribbons into the mane and tail as you attach them. This adds beautiful shimmer and movement!
Attach the Head and Horn
Now comes one of the most important parts – attaching the head! Pin the head to the body, adjusting it until the placement looks perfect to you. Take your time finding just the right angle.
Use whip stitch to neatly and securely close the gap between the head and body all the way around. Then stitch on the horn the same way. Fun fact – unicorns are usually depicted with a single horn protruding from their forehead.
| Unicorn Horn Facts | Description |
|---|---|
| Purpose | Unicorn horns are believed to have magical healing powers and the ability to purify water. |
| Appearance | Made of keratin like rhino horns. Usually a pearly white, silver, or gold color and decorated with jewels. |
| Length | Anywhere from a few inches to three feet long. |
Add the Face Details
Your unicorn is really coming together now! Have fun stitching on the face details like eyes, eyelashes, nose, blush, and mouth. Adjust and tweak until you love how the facial features look.
For sparkly eyes, sew on rhinestones, gems or glittery buttons. Give your unicorn long fluttering eyelashes made from strands of yarn. Have fun making your unicorn as unique as you!
Once all the pieces are securely attached, stuff your unicorn well with fiberfill, then use a ladder stitch to neatly close up the last seam. Trim all yarn ends and give your magical new friend a big hug!
Add the Finishing Touches
Once your unicorn’s body is stuffed and you’re happy with its shape and size, the next step is to add the finishing touches to bring your magical creation to life. With a bit of crafty care and attention to detail, your unicorn plushie will have everyone oohing and ahhing over how adorable it is!
Attach the Mane and Tail
A unicorn simply wouldn’t be complete without a glorious rainbow mane and a fabulous swishy tail. Before attaching them, lightly brush each strand with a pet brush or small comb to prevent any tangles.
Then, using a yarn or tapestry needle, weave the ends of the mane strands one by one through stitches along the back of the unicorn’s neck. Secure each strand with tight knots close to the neck, trimming any excess yarn. Do the same along the top of the rump to attach the tail.
If you want to style the mane and tail, gently twist, curl or braid the strands using your fingers once attached. This will give your unicorn even more personality!
Add the Horn and Ears
Now it’s time to affix your unicorn’s magical golden horn. Position it in the center of the forehead and use a yarn needle to sew it on securely with tight whipstitches. For a touch of whimsy, glue a colorful pompom, sequins or small bells to the horn’s tip.
Next, pin the ears in place and carefully ladder stitch them to the sides of the head using matching yarn. The ears should sit upright but have a natural, slightly floppy look. For extra support, add a thin wire armature before sewing.
Embroider Facial Details
Bring your unicorn’s sweet face to life by backstitching or appliqueing facial features like eyes, eyelashes, rosy cheeks and a smiling mouth. Use pink or coral yarn for blush, black for nostrils and eyelashes, and bright colors like rainbow shades for lively anime-style eyes.
Get creative and give your unicorn a lively or gentle personality through its expression.
For a sparkly magical touch, glue rhinestones, mini pom poms or sequins around the eyes and mouth. This adds a whimsical element kids and the young at heart are sure to love.
Add Accessories
The final flourish for your stuffed unicorn is to decorate it with charming accessories like a flower crown, necklace, bowtie or colorful saddle blanket. These small details will make your handmade unicorn truly one-of-a-kind. Here are some fun ideas to try:
- Braid together ribbons and fake flowers to create a floral crown or garland for your unicorn’s mane
- Make a beaded necklace or bracelet for one leg from embroidery floss, beads and bells
- Cut a satin ribbon into strips and tie little bows onto the mane, tail or ears
- Sew or glue a tiny colorful felt blanket onto the unicorn’s back
Place your finished unicorn plushie on a shelf, use it as a cozy pillow or gift it to a special unicorn fan in your life. However you decide to show it off, bask in the magic and pride of creating something so special with your own two hands!
Conclusion
Creating a crocheted unicorn is an enjoyable craft project for all skill levels. By following the step-by-step instructions in this guide and letting your creativity shine through customizations, you’ll have a magical stuffed pal in no time.
Snuggle up with your homemade unicorn and enjoy the fruits of your fabulous crochet labor!