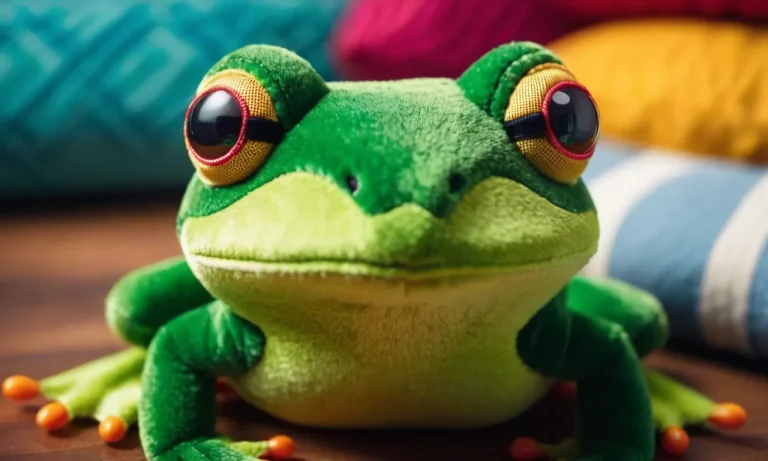
Do you have a bunch of stuffed animals lying around that you’re not quite sure what to do with? Have you always dreamed of having your own private zoo filled with cute and cuddly creatures? If so, then why not combine those two ideas and create your very own stuffed animal zoo!
If you’re short on time, here’s a quick answer to your question: Gather up all your stuffed animals, set up zoo enclosures using cardboard boxes or other materials you have at home, decorate them based on zoo habitats like a jungle, arctic, or safari scene, and let your imagination run wild as you admire your new stuffed zoo creation.
In this comprehensive guide, we’ll cover everything you need to know to build an amazing stuffed animal zoo, including ideas for enclosures and scenery, tips on assigning animals to the right habitats, suggestions for fun additions like zookeeper stations and interactive elements, as well as advice for putting it all together into a cohesive and creative stuffed zoo masterpiece.
Gather Up Your Stuffed Animal Collection
Take Inventory of Animals
The first step in building your stuffed animal zoo is taking an inventory of the animals you already have. Lay out all your stuffed animals and make a list of what you’ve got. Are there certain animals you have a lot of, like cats, dogs or bears?
Are you missing key zoo animals like monkeys, giraffes or elephants? Getting a full inventory will help you plan the rest of your zoo.
Clean or Repair Stuffed Animals
Once you’ve gathered and counted your animals, it’s a good idea to clean or repair any that need it. Check carefully for rips, missing eyes or other damage that needs mending. Use a needle and thread or fabric glue to make any needed repairs.
Frayed seams and holes can be difficult to fix, but do your best! 😊 Give the intact animals a wash or surface clean if needed – this will make them fresh and bright for displaying in your zoo.
Obtain Additional Animals If Needed
After taking inventory and sprucing up your current collection, you’ll likely find you need more animals to fill out your zoo. Think about habitat areas you want to represent, like the savannah, rainforest or Arctic.
Obtain extra stuffed animals through purchases at thrift or discount stores, gifts from friends and family, or sites like eBay. For unusual animals like camels or pandas, specialty toy stores or online retailers may be your best bet.
Here is a table comparing some sources for finding additional stuffed animals:
| Source | Cost | Selection |
|---|---|---|
| Thrift/Discount Stores | Cheap | Hit-or-miss |
| eBay | Varies | Broad |
| Specialty Toy Stores | Higher | Best for rare animals |
So dig through your childhood keepsakes, scout local stores, and browse online listings until your zoo crew feels complete. With some persistence you can gather a stuffed animal collection to rival any world-class zoo! Check out sites like StuffedAnimals.com for more stuffed animal ideas and tips.
Plan Out Your Stuffed Zoo Layout and Habitats
Decide How Many & What Types of Enclosures
The exciting first step in building your own stuffed animal zoo is deciding how many and what types of enclosures or habitats you want to create! Do you envision sprawling savannahs, dense jungles, snow-capped mountains for mountain goats, or muddy wallows for happy hippos?
🦛 Determine how much space you have to work with and think about your favorite stuffed animals or the themes that inspire you most. We recommend starting with 3-5 main habitat areas as a great goal for most home zoos.
Designate Space and Choose Habitat Themes
Once you’ve decided on key habitat types, the fun really begins! 🤩 Designate areas in your home for each one – under your bed can be the perfect shady forest nook while wide open spaces like the living room are great savannah backdrop. Really let your imagination run wild in choosing themes.
Go with realistic environments modeled after real zoos or get creative – how about a mythological land for your magical creatures? The only limit is your stuffed menagerie’s wildest dreams!
Map Out Layout and Flow Through Zoo
With your key habitats in place, map out how visitors will travel through your zoo. Part of the magic of any great zoo is experiencing the transitions from one area to the next. Place signs guiding guests between regions and create trails or paths linking habitats using yarn, fabric, or cardboard.
For extra fun, set up a monorail with toy trains or assign specific planes, boats, or even magical portals for traveling between lands! With some creative mapping, your guests will feel fully immersed in your stuffed zoo.
Assemble Your Zoo Enclosures and Displays
Construct Structures from Cardboard or Wood
The fun begins when you start putting together the actual stuffed animal enclosures and zoo displays. You can build basic structures out of cardboard, wood planks, craft sticks, or other materials you likely have around the house.
Get creative with enclosure shapes and sizes – build a rectangular lion enclosure, a round monkey island, an octagonal reptile house, or whatever fun ideas you dream up!
For stability, glue or tape cardstock cutouts onto a cardboard base. Use craft sticks and wood pieces to construct frames for more durable habitats. Refer to online tutorials for tips on working with various materials.
The sky’s the limit, so stretch your imagination to make each animal living space unique!
Decorate According to Habitat Theme
Now comes the exciting part – decking out your zoo enclosures with habitat-appropriate décor! Add realism by using craft supplies like paper, fabric, sticks, and stones to mimic natural environments. For example:
- Use cotton balls, fake snow, and popsicle sticks to create an Arctic area for polar bear and penguin stuffies
- Line an enclosure with green construction paper grass and plastic plants for panda and koala bears
- Glue down brown craft sand and plastic palm trees to build a desert oasis for camels and meerkats
You can incorporate kid-friendly options like colorful patterned scrapbook paper,pom poms, googly eyes and foam shapes. Encourage little ones’ involvement by allowing them to unleash their creativity on habitat decorations!
Add Enclosure Labels and Info Signs
Infusing an educational element takes your stuffed animal zoo to the next level. Make information signs detailing key facts about each species – their natural habitat, diet, behavior, conservation status, or other interesting tidbits. Display eye-catching images alongside the text for visual appeal.
For an extra whimsical touch, you can name your furry residents and create cute profiles for them like zoo brochures! Additionally, craft signs indicating enclosure rules (e.g. “Don’t feed the meerkats!”) and imaginative warnings like “Beware – Komodo dragon on premises!” for added humor.
With enclosed structures built, fun habitats created, and informative signs installed, you will have crafted a magical world for stuffed animals to thrive. Now just sit back and enjoy your homemade zoo! Let those creative juices flow! 😊👍
Curate and Place Your Stuffed Animals
Assign Animals to Matching Habitats
When designing your stuffed animal zoo displays, first consider the natural habitats of each animal and group them accordingly for an authentic look. For example, place your arctic-dwelling stuffed animals like polar bears, arctic foxes, and penguins together in an icy, snowy area.
Desert creatures like camels, lizards, and snakes could go in a sandy space with cacti and tumbleweeds.
Arrange Realistically Within Displays
Once your stuffed critters are grouped into their geographic zones, arrange them in natural-looking poses. Have the polar bears wrestling as if they were cubs or perched on toy ice floes, the penguins huddled as a colony, giraffes nibbling leaves from mini plastic trees, etc.
Get creative with small-scale zoo toys like tiny food bowls, nests, hammocks or climbing branches to really bring your displays to life!
| Realistic Touches | Whimsical Twists |
| – Tiny Paw Prints | – Glittery Unicorn Horn |
| – Itty-Bitty Bones | – Rainbow Llama Wool |
| – Chewed Bamboo Shoots | – Butterfly Fairy Wings |
Have fun adding your own special touches! Get as detailed as you like with elements both realistic and magical.
Introduce Imaginary or Fantasy Animals
Don’t limit your stuffed zoo to ordinary real-world species! Tap into your creativity by also including mythical creatures like dragons, phoenixes, jackalopes and more. Really let your imagination run wild. Maybe group them in a special section like “The Enchanted Forest” or “Legendary Lane“.
Go all out decorating their fanciful habitat displays with sparkles, rainbows, clouds and other whimsy. Those stuffed animals let you bring in that extra dash of wonder. 🦄
Enhance Exhibits with Interactive Elements
Incorporate Zookeeper Stations
Adding pretend zookeeper stations or veterinarian clinics allows children to care for the stuffed animals just like real zookeepers! Set up a table or cardboard play structure with stuffed animal medical supplies like bandages, tiny stethoscopes, and toy medicine bottles.
Encourage imaginative play by having kids check heartbeats, tend to injuries, and scan “patient” charts. Zookeeper uniforms, name badges, and clipboards reinforce the roleplaying. This hands-on engagement brings the stuffed critters to life.
Add Buttons to Activate Sounds
Incorporate buttons that make animal sounds when pressed. Attach recordable sound modules to exhibits, hiding them behind trees or in caves. Kids can press a button near the tiger area to hear growls or get monkey sounds at the primate zone. This auditory addition helps the zoo come alive.
For bonus technology integration, use MaKey MaKey kits to trigger animal sounds from play dough sculpts or conductive materials the children make themselves.
Set Up Observation Areas
Create cozy spaces for kids to quietly observe the stuffed animals. Supply binoculars, notebooks, and pencils for recording animal behaviors and characteristics. Add educational books or laminated info sheets to reinforce learning.
Children may dictate stories about the animals to parents or caregivers. This facilitates calm engagement and curiosity. For added fancy, incorporate elements like periscopes made from cardboard tubes or “observation bubbles” fashioned from transparent storage containers.
The observation areas facilitate more mindful, attentive stuffed animal interactions.
Conclusion
Creating your own stuffed animal zoo is a fun DIY project that lets your imagination run wild. By gathering up your plush pals, constructing themed habitats from cardboard or wood, decking out creative displays, and playfully arranging your furry residents, you can bring an indoor zoo experience to life right at home.
Add interactive elements to take your stuffed zoo to the next level and spark even more family fun. However you choose to build yours, enjoy showcasing and admiring your amazing collection of creatures in whimsical new ways with a homemade stuffed animal zoo!


